Images in-depth
Our article How to add videos, links, and images to my flipbook? shows you the basics of adding images to your flipbooks. In this article, we will cover all the details so you get maximum use out of it. Here's what we'll cover:
- Using inline images
- Using pop-up images
- Sizing and aligning your images to perfection
- Working with overlapping elements
- Controlling the icons
- What happens to my images when I replace the PDF?
Using Inline images
Inline images are non-clickable parts of the page. You simply add an image on top of your content or in an empty spot. The most standard use cases are to enrich your content with new images or to replace outdated pictures in your book without replacing the whole PDF. But that's not all!
Highlight content
Another great use case is to add transparent images. For example, if you create a catalog for a whole year. Invariably some of the items in your catalog are temporarily out of stock, or part of a promotional sale. Using transparent images is a great and easy way to let your reader know about that.
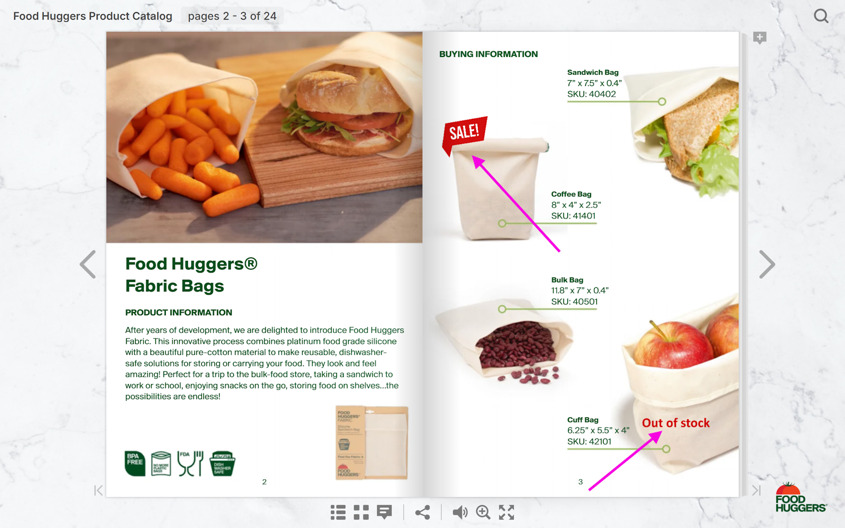
A professional designer can make a few transparent images that match the style of your content in no time. You simply add the image once and copy/paste it using the standard keyboard shortcuts to quickly replicate it as often as you need.
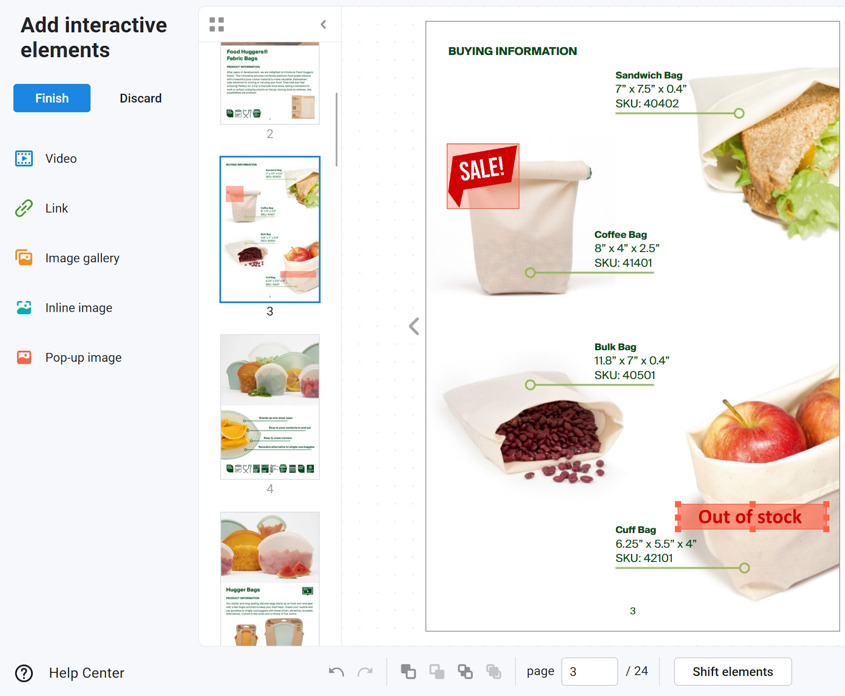
When the promotion ends, you simply move them around to the new items that are on sale or remove them.
Creating hotspots
You can also combine inline images with links to create hotspots in your flipbook.
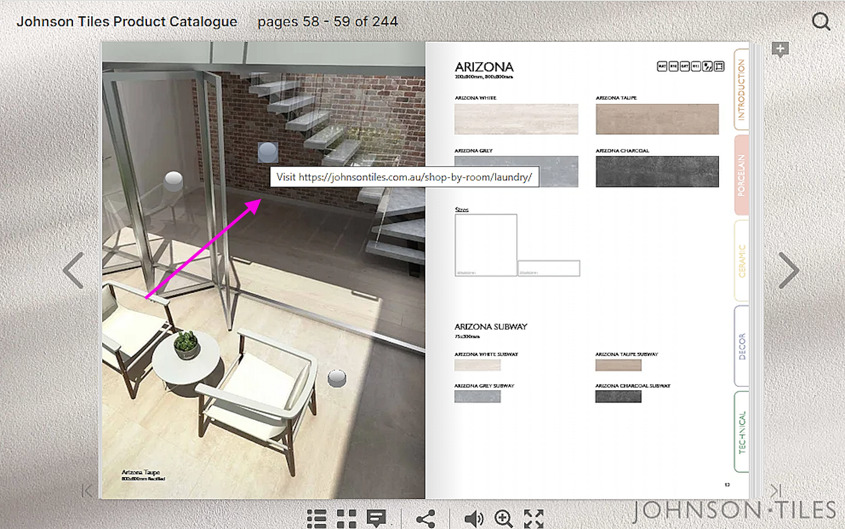
To achieve an effect like this, you simply add a PNG image with a transparent background (like the grey one we added) to your flipbook first as an Inline image. 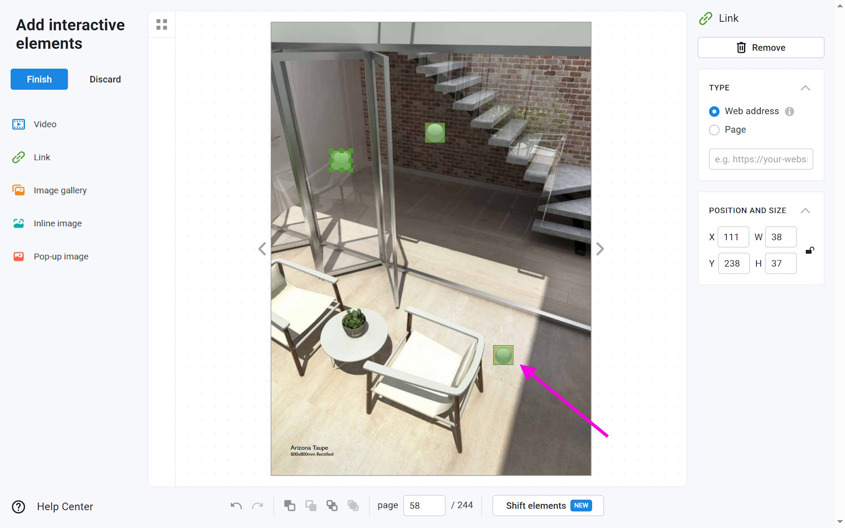
Then, you just add a small link on top of that. For a bit of extra spice, you could even add an animated GIF instead of a plain image:
Using Pop-up Images
Unlike Inline images, Pop-up images are interactive. Your readers can click on them so that the image opens in a pop-up window. Pop-up images are great to show a high-quality picture of your merchandise, show a product in different colors, or display it from different angles. Often your main brochure or catalog simply doesn’t have the space available to show all such details. But for potential buyers, it can make all the difference.
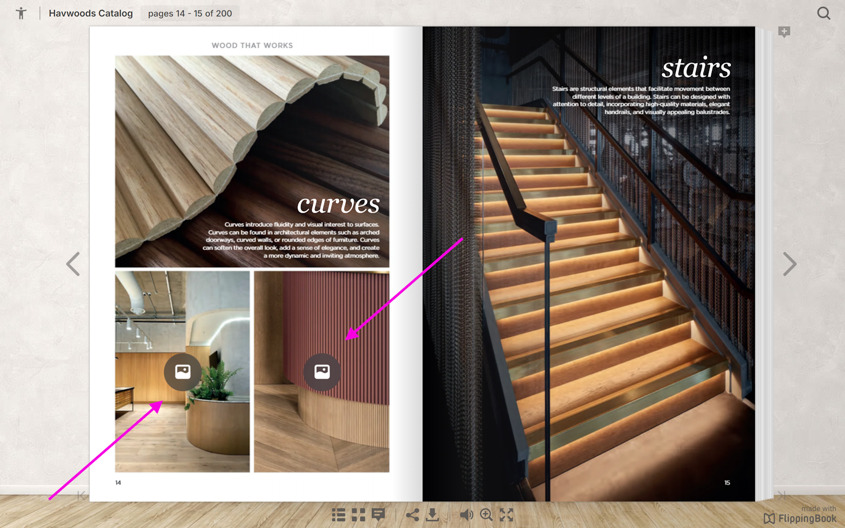
As you can see in the example above, the author disabled Show Preview. If this option is enabled, we show a small preview of the image itself in your flipbook. If you don’t need the preview image because you have an even better image in your PDF already, you can disable this option.
They also set the Show icon setting to On hover so that the icon is only highlighted briefly when you open the page, or when you hover over the clickable area.
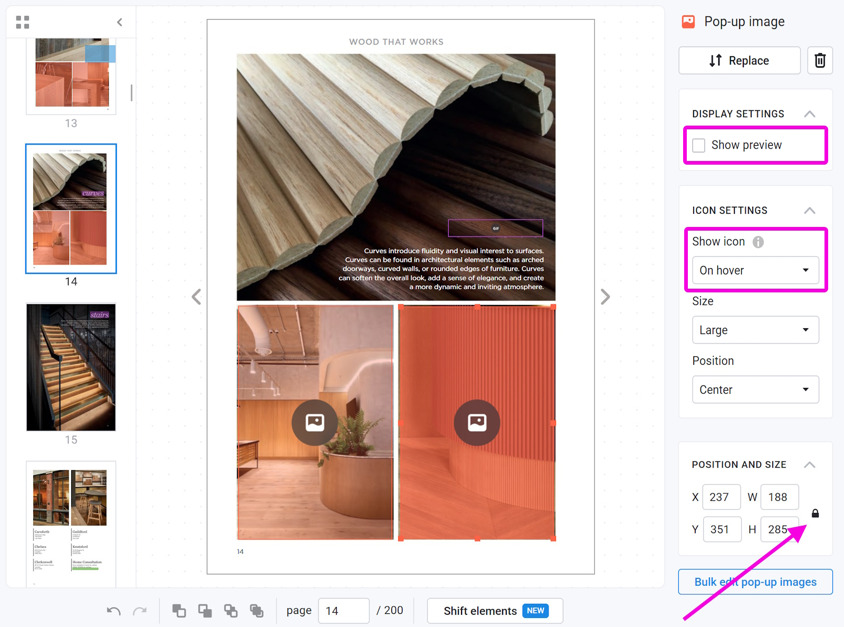
Note that when you resize the clickable area for your pop-up image, then by default it keeps the aspect ratio of your image. To make it fit perfectly to the image in your PDF, you can press the lock icon in the Position and size section to unlock it. Now you can resize your clickable area at will!
Sizing and aligning your images to perfection
The standard way of sizing images is to just move them around with your mouse and drag the corners. But what if you have several images that you want to have exactly the same width, height, and position? Or how to make it exactly match the image or text on which you placed it?
Use arrow keys
One tool you have at your disposal is the arrow keys. If you select a link and then use the arrow keys you can nudge them in either direction by a single pixel.
Change Position and size settings
In the menu panel on the right-hand side, we show the exact position and sizes. You can edit these values manually. So if you want several images to be of the same size, and aligned on the left, then you can
- Change the first image to the ideal size.
- Write down the X value and width of the first image.
- Manually edit the X value and width of the other images accordingly.
- If you want to align your images horizontally, give them the same Y values and height instead.
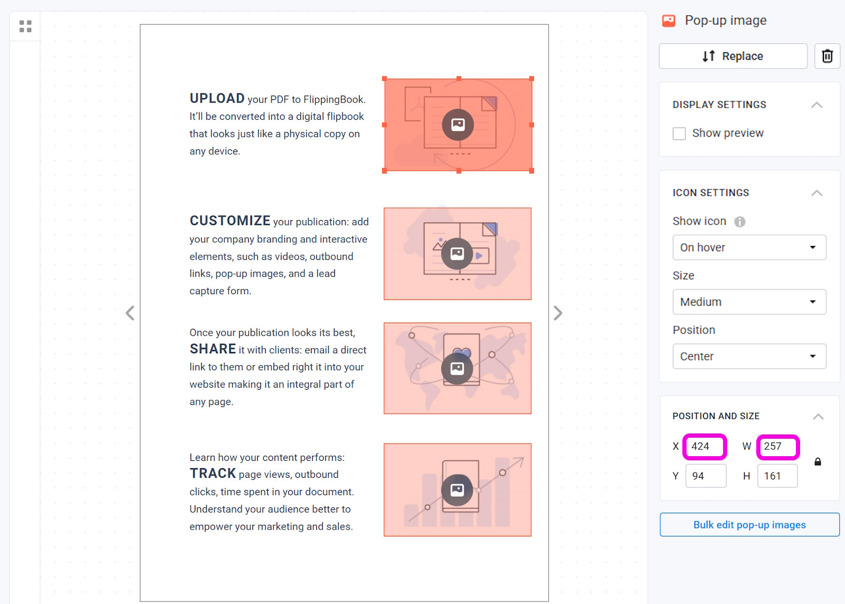
In the example above, we aligned the small pop-up images by manually making the X-position and Width of all the images identical to the values of the first one.
Working with overlapping elements
It is possible to add elements to your flipbook that overlap each other. This way, you can -for example- create stacked images. Another common situation is where you add an inline image on a page but want it to be clickable. This means that you also add a link of the same size.
When working with overlapping elements, you have to pay attention to the ordering. If you add the link first and the image later, then the image will be in a higher 'layer' than the link. As a result, the link will be covered by the image and won't be clickable!
If this happens, you can simply change the ordering of the elements. In the example above, we have added three images: a red, a yellow, and a blue box. The yellow image is currently selected. Using the controls in the panel below the page, you can change the ordering. From left to right:
- Send backward moves the selected element one layer down. This would hide the yellow box behind the red one.
- Bring forward moves the selected element one layer up. This would put the yellow box over the blue one.
- Send to back sends the selected element to the lowest layer. It will be covered by all other elements.
- Bring to front moves the selected element to the topmost layer. It will cover all other elements.
Controlling the icons
By default, we add icons to pop-up images to help your readers notice them. You can change their size, position, and behavior in the Icon Settings section. If you need some additional info as to how they work, have a look at our article Icon settings. If you want to change the settings for all the images in your flipbook, then our Bulk change option is for you!
What happens to my images when I replace the PDF?
If you replace your PDF with a new one (this feature is available in Starter and higher plans), then we will ask you to do with any images and other content you added: keep them (if your PDF is pretty similar with just a few small edits) or remove them (if you basically have a completely new document). If you made extensive changes in the FlippingBook Online Editor, then we recommend reading our article Can I replace my PDF without changing the URL?