Setting up SSO with Microsoft
This article contains instructions for connecting FlippingBook Online with Microsoft Entra (previously known as Microsoft Azure Active Directory). It is intended for Entra administrators.
Initial setup
- Contact our support team and indicate if you want to use SSO to log in to the account access or for flipbook access.
- Await the confirmation message with details that you will need from the support team.
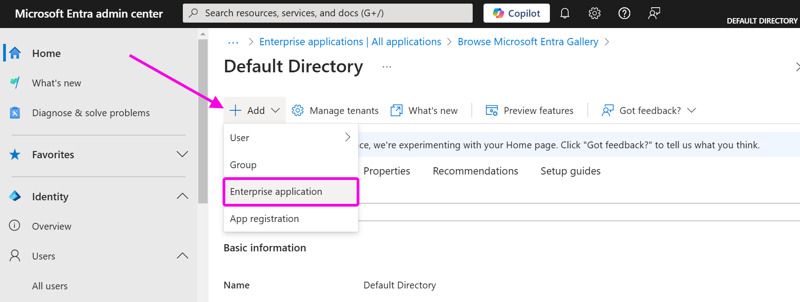
Log in to Entra ID. - Click on +Add and select Enterprise Application from the dropdown menu.
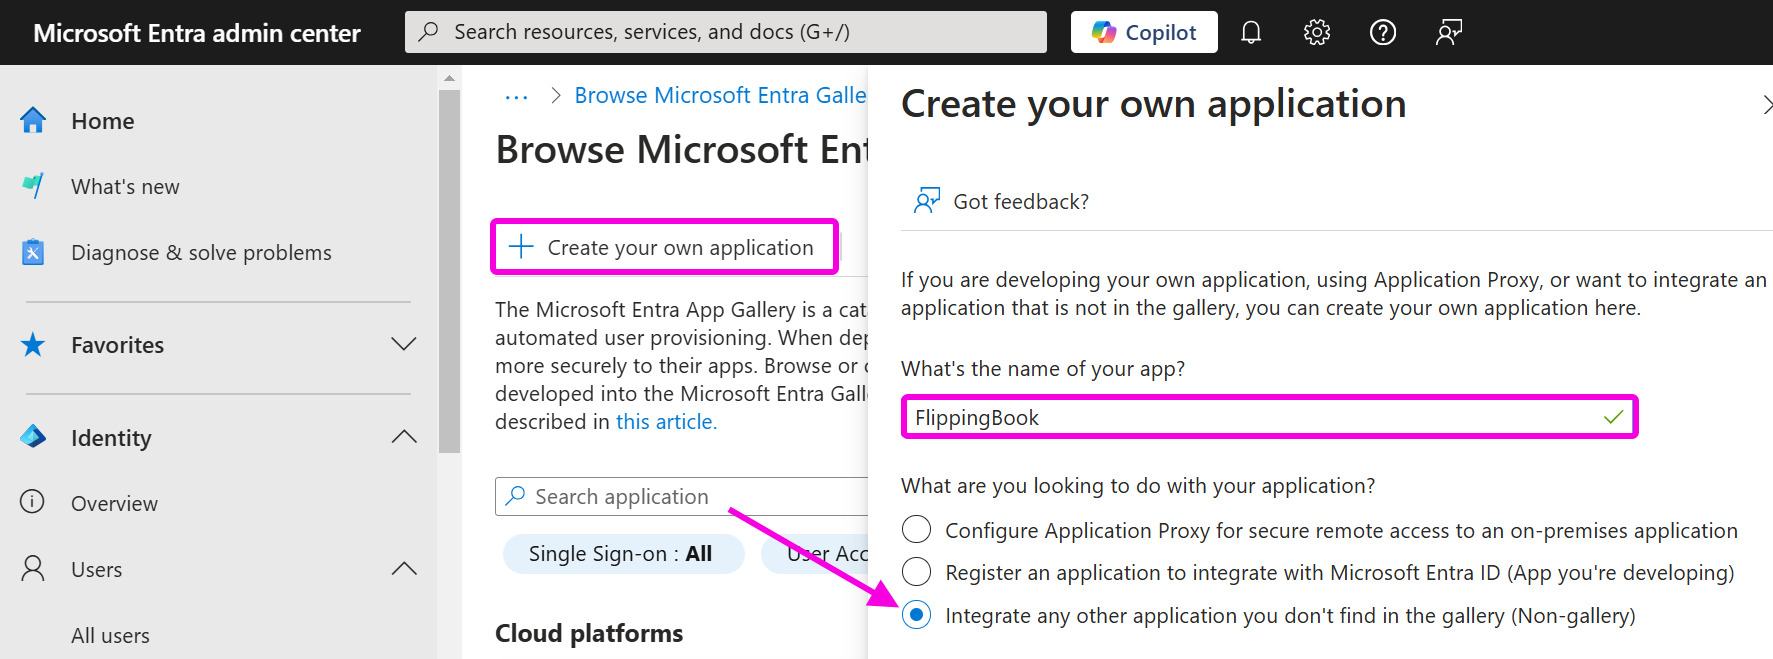
- Click on + Create your own application.
- Give your app a proper name (such as FlippingBook Online or FlippingBook readers) and make sure that the option Integrate any other application you don't find in the gallery (Non-gallery) is selected. This should be the default option. Then press Create.
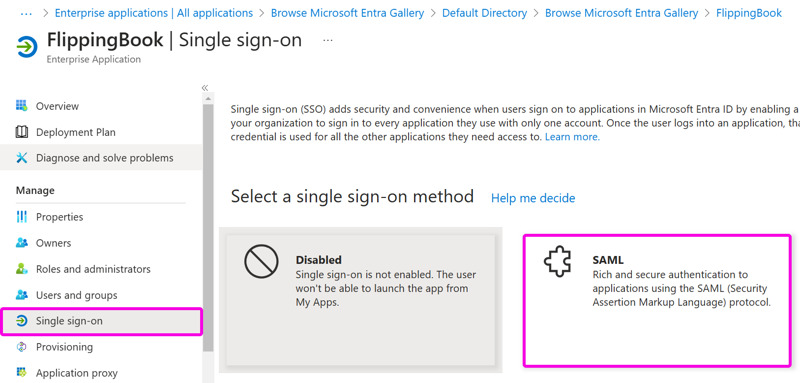
- After the application has been created, select Single sign-on in the menu panel and select SAML as the sign-on method.
- Press the Edit icon in the Basic SAML Configuration.
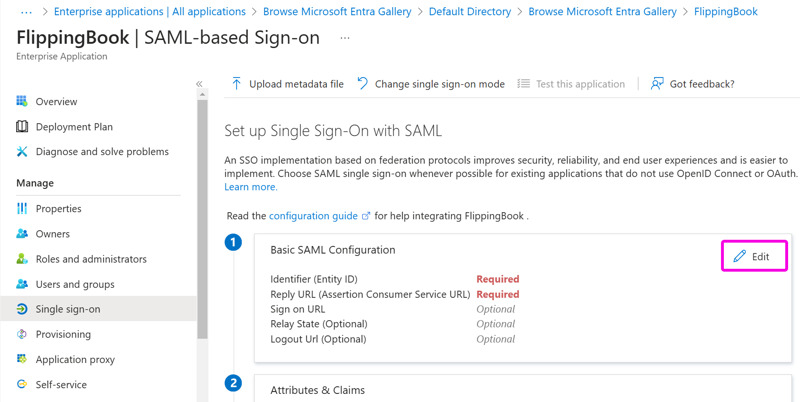
Then, using the information that you have received from our support team, proceed as follows:- in the subsection Identifier (Entity ID) press Add identifier and paste the <Entity ID URL> you received
- in the subsection Identifier Reply URL (Assertion Consumer Service URL) press Add identifier and paste the <Single Sign On URL>
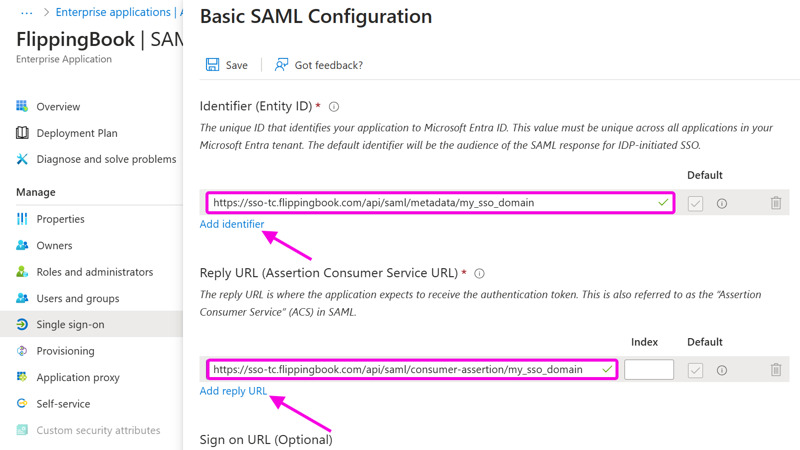
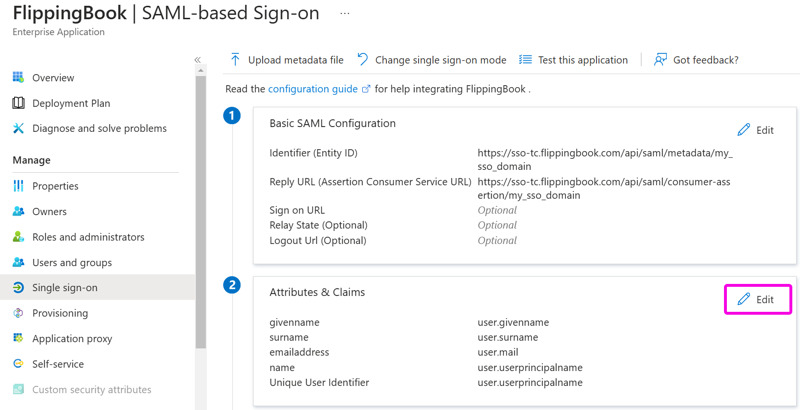
- Press Save. When you return to the settings overview, press the Edit icon in the Attributes & Claims section.
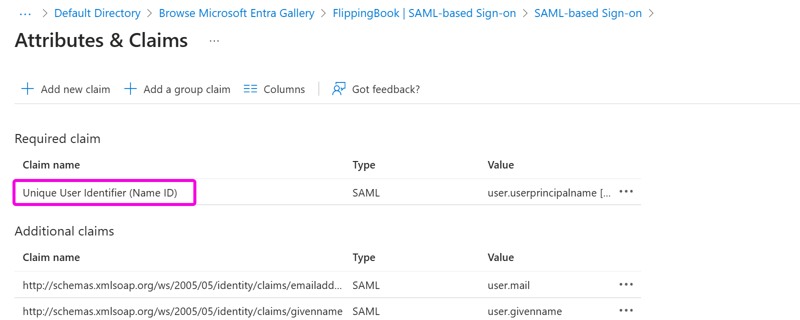
- Under Claim name, click on Unique User Identifier (Name ID).
- In the Manage Claim screen, change the Source attribute to user.mail.
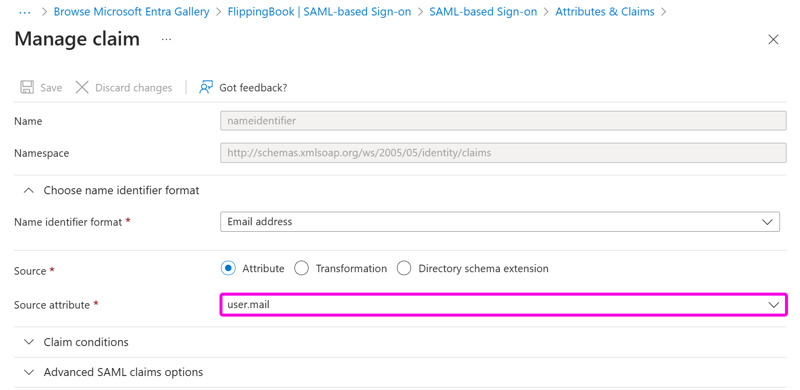
Press Save, close the window, and close the Attributes & Claims window too to return to the SAML settings screen. - In the SAML Signing Certificate, press the Download link behind Federation Metadata XML.
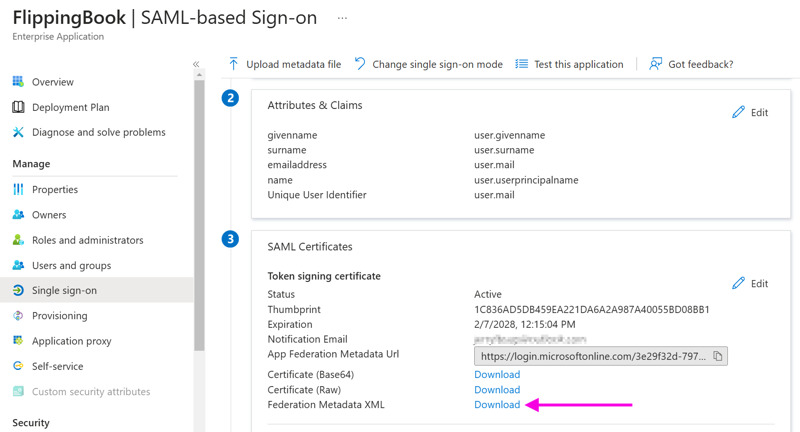
Send the downloaded XML file to our support team. We need it to finalize the setup. - After you receive our confirmation that we have completed the setup, add your users/groups to the newly created application as normal.