How to create a table of contents?
This tutorial is available as a video and text (below the video).
In this article we explain how to:
- automatically import a TOC from the original PDF
- manually add the TOC using FlippingBook Publisher when there is no table of contents in the original PDF
- make the TOC appear directly when users open your publication
- hide the page numbers in your TOC
- prevent the automatic import of the TOC from the PDF
How do I import my table of contents from the original file?
In order to import your table of contents automatically, you need bookmarks in your PDF file — you can see these bookmarks by opening your PDF in any PDF viewer:

If your file contains bookmarks, FlippingBook Publisher will extract them when importing your PDF and they will appear as a table of contents:

You can then edit your imported table of contents in the Table of Contents tab (see the screenshots in the section below). The same tab is used to create a table of contents manually.
How do I create a table of contents manually for my publication in FlippingBook Publisher?
To create a table of contents after your PDF has been imported into FlippingBook Publisher, you need to do the following:
1. Select the Table of Contents tab on the left of the preview pane:
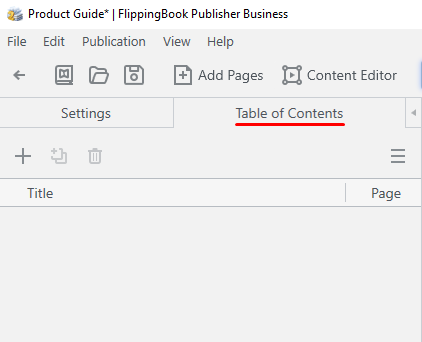
Here you can add items to the table of contents.
2. To start creating a table of contents item, go to a page to which you’d like to add a table of contents and click on the  button in the Table of Contents tab — you will see the new item appear and will be able to edit its title:
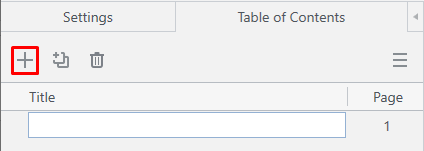
It is possible to make a Table of Contents item consisting of multiple lines - just press Ctrl + Enter to jump to the next line as you edit the item's title:

Once you have finished with the title, you will see it as an active table of contents item, leading to the specified page:

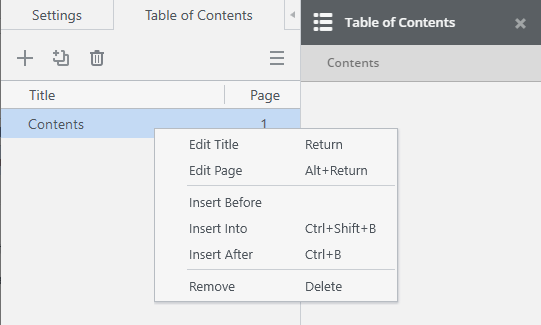
To edit a table of contents item, right-click on it. You will be able to edit its title, remove it, insert a new item before or after it, and insert a new item into it — which will turn it into a group item folder in the table of contents:
To create a new group item in a table of contents, click on the ![]() button in the Table of Contents tab. You can now enter the name of the first item in it:
button in the Table of Contents tab. You can now enter the name of the first item in it:
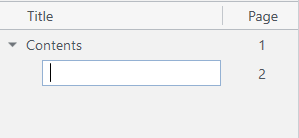
This table of contents item functions as a directory for other items — subsections.
If you want to delete one of the items, select it in the Table of Contents tab and press the ![]() button or right-click and select Remove in the context menu. This will remove the table of contents item from the flipbook:
button or right-click and select Remove in the context menu. This will remove the table of contents item from the flipbook:
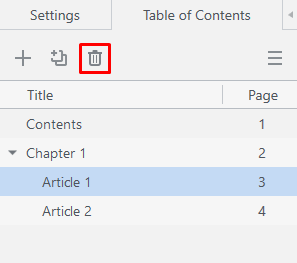
Do not delete the group item (group items always have the down arrow icon before their names) unless you want to get rid of all the items in it too, as they would be deleted altogether.
Even when you delete something by mistake, this can be corrected immediately – there would be a notification with the Undo command every time you delete an item from the table of contents:

Once your table of contents is ready, you can save it for future use (as a file with the special .p2toc extension) and upload it to a different project later on if needed — just click on the menu on the right side of the Table of Contents tab to see these options. You can also clear all the items at once here, as well as use TOC from another file in your current project:
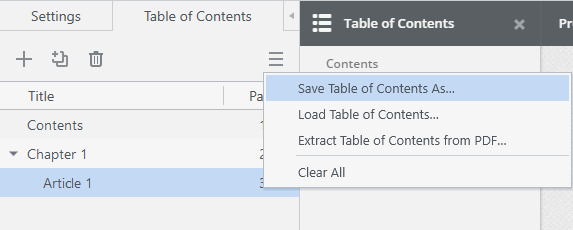
Setting the TOC as default
If the flipbook is large, you can help your readers by setting the table of contents as visible by default.
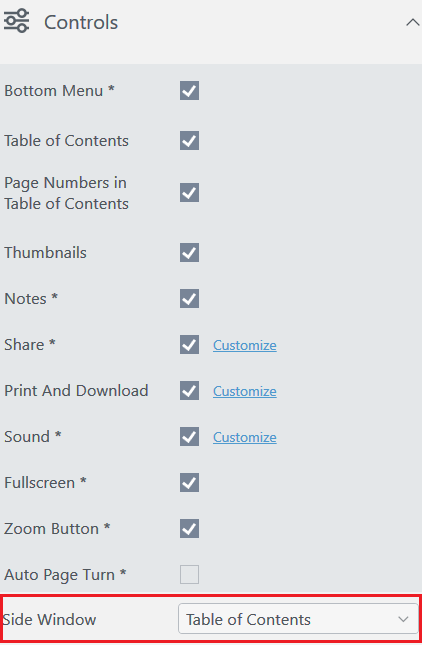
Go to the Settings tab on the left of your preview pane. Select Table of Contents as the Side Window option from the Controls section:
How do I hide the page numbers from my Table of Contents?
The same Controls panel allows you to hide the page numbers in the Table of Contents items. For that, uncheck the checkbox Page Numbers in Table of Contents:
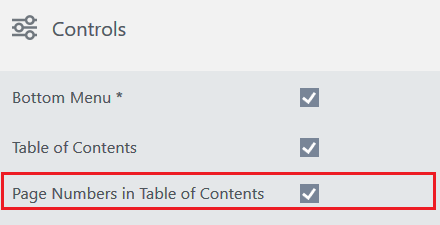
How do I prevent the automatic import of the table of contents from my PDF?
If you don’t want to use bookmarks of your PDF files to create a table of contents, then it is possible to prevent this as follows:
- In the Import PDF dialog click on the
 button after the conversion profile

- In the pop-up window that appears unselect the Extract table of contents checkbox

