Privacy settings: Restricted Access
With FlippingBook Online Advanced and higher, you can restrict access to your flipbooks to specific email addresses (such as john.doe@test.com) or to entire domains (like test.com). If you add a domain, all users on that domain can get access - great for giving access to everyone in your company, without the need for managing individual addresses!
Here is how it works in detail:
- Your reader opens the link to your flipbook and is prompted for their email.
- We check if the email address your reader provided is on the list of users/domains you granted access to.
- If they are on the access list, we email them a 6-digit code (a.k.a. one-time password or OTP)
- If the reader enters the correct code, we grant access to the flipbook. The reader will not need to re-authenticate for the next 30 days.
In this article, we cover the following topics:
- Setting Up Email/Domain Access Restrictions
- Deleting an Email/Domain
- Setting Default Email/Domain Restrictions
- Opening flipbooks with restricted access
- Access via Single Sign-On instead of code by email
Setting Up Email/Domain Access Restrictions
Here’s how you can restrict access to your flipbooks to specific email addresses or domains:
- In your list of flipbooks, click on the Customize icon behind the publication name.
- Scroll down to the Privacy section and click on it to unfold the options.
- Select the Restricted Access setting. If you use the Enterprise, choose Email/Domain in the selector.
- Click on the Manage Access button.
- In the pop-up, enter an email address (or domain) that you want to give access to. Then click the tick to add it to your list. You can also paste a list of addresses into this field, with each address separated by either a comma or a space.
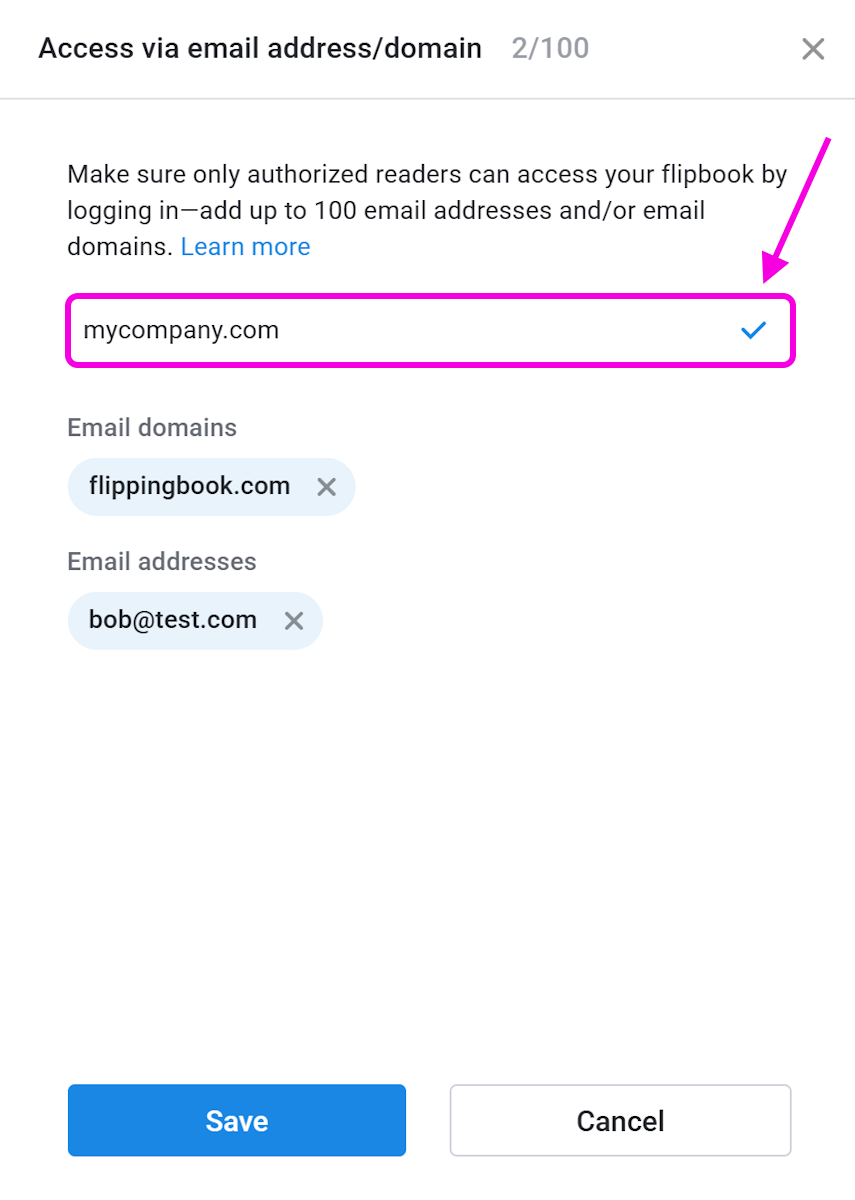
- When done, press Save and click on the Finish button to save Email/Domain authorization to your flipbook.
Note! You can add up to 100 emails/domains with access to your flipbook. If you add a domain (e.g. mycompany.com), all users whose email ends in @mycompany.com can get access. This still counts as 1 email/domain from the 100 you can add.
Deleting an Email/Domain
If you decide to delete any email or domain you should repeat the first three steps above, click on the Manage Access button, find the email in the alphabetically sorted list, and press the cross icon next to it. After that, click on Save and Finish.
Setting Default Email/Domain Restrictions
If you want all new flipbooks you create to be restricted, you can set restricted access to authorized emails and domains as default. To do this, configure this type of access for your flipbook, and tick the Make settings default for future flipbooks box before hitting the Finish button, as we explain in the Can I save my flipbook settings as default? article.
Opening flipbooks with restricted access
Once your readers open your flipbook with restricted access, they will need to enter their email address and, after that, the 6-digit code they receive by email. If correct, we grant access to the flipbook.
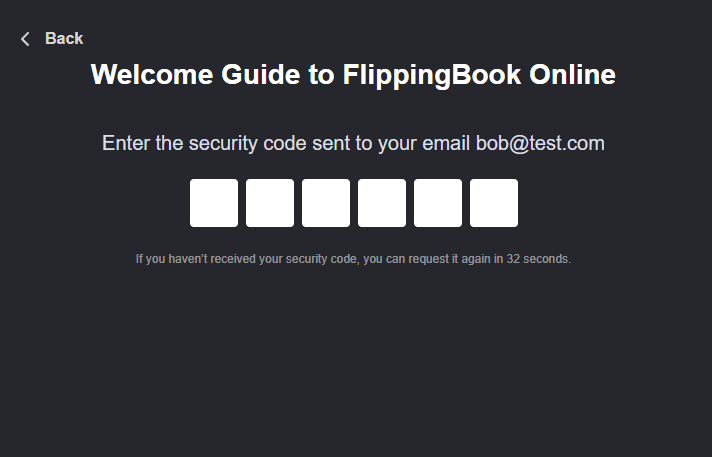
When your reader has confirmed their email address, they can keep opening this and other email-restricted flipbooks shared with them on this device for 30 days. After 30 days, they will again be asked to confirm their email address.
Tip! If you share a flipbook link with restricted access, remind your readers to check their spam or junk folder if they don’t receive the authorization code.
Access via Single Sign-On (SSO)
As an alternative to authentication by email/domain, we also offer access via SSO, but this is available only in FlippingBook Online Enterprise. It can be convenient as it won’t require any code to enter to open a flipbook. The information about how to set it up is available in our articles below:
Note! This method of authorization will not work if you self-host flipbooks on your own server.