

 FlippingBook Publisher
 FlippingBook Automation
 Salespal
Privacy settings: Restricted Access
 Product: FlippingBook Online
With FlippingBook Online Advanced and higher, you can restrict access to your flipbooks to specific email addresses (such as john.doe@test.com) or to entire domains (like test.com). If you add a domain, all users on that domain can get access - great for giving access to everyone in your company, without the need for managing individual addresses!
Here is how it works in detail:
- Your reader opens the link to your flipbook and is prompted for their email.
- We check if the email address your reader entered is on the list of users/domains you granted access to.
- If they are on the access list, we email them a 6-digit code (a.k.a. one-time password or OTP)
- If the reader enters the correct code, we grant access to the flipbook. The reader will not need to re-authenticate for the next 30 days.
In this article, we cover the following topics:
- Setting Up Email/Domain Access Restrictions
- Manual Setup of Email and Domain Restrictions
- Providing Access to a List of Readers
- Troubleshooting and Requirements for Your Readers List
- Applying identical access to multiple flipbooks
- Setting Default Email/Domain Restrictions
- Opening flipbooks with restricted access
- Access via Single Sign-On
Setting Up Email/Domain Access Restrictions
There are two ways to manage authorized readers:
- Manual entry - You add and remove email addresses directly in the interface. This is convenient and quick when you only have a small number (max 100) of email addresses or domains.
- CSV/TXT upload - You upload the file with the email addresses of authorized users - ideal for handling large lists of email addresses that you manage elsewhere.
⚠️Important! You can use only one method of managing email addresses at a time. This means that:
- If you upload a CSV file, you cannot add/remove addresses manually in the interface later. You will have to upload a modified file. If you try to add emails manually anyway, only those emails will have access. The addresses in the CSV file will be ignored.
- If you enter email addresses manually first and then upload a CSV/TXT file, your manual selection is replaced by the addresses in the file. They are not added to the existing selection.
You will see a warning message if you do this.
Manage authorized readers manually
You can add and remove email addresses and domains manually. You can add up to 100 emails/domains with access to your flipbook this way. If you add a domain (e.g., mycompany.com), all users whose email ends in @mycompany.com can get access. This counts as 1 email/domain from the 100 you can add. The exact steps:
- In your list of flipbooks, click on the Customize icon behind the publication name.
- Scroll down to the Privacy section and click on it to unfold the options.
- Select the Restricted Access setting. Enterprise plan clients see a selector where they can choose Email/Domain or SSO. Select Email/Domain.
- Click on the Manage Access button.
- In the pop-up, on the Add Emails tab, enter the email address or domain you want to give access to. You can also paste a list of addresses into this field, separating each address with a comma, space, semicolon, or newline.
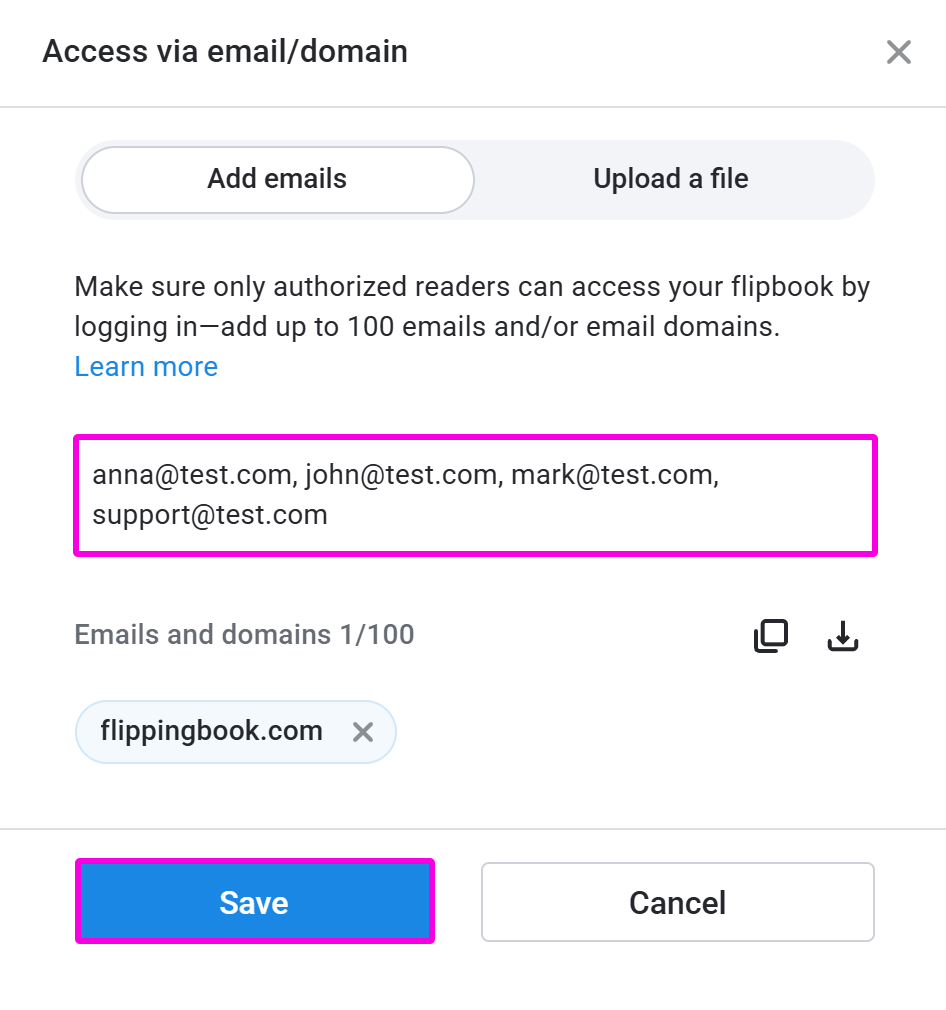
- When done, press Save and Finish to save Email/Domain authorization to your flipbook.
To delete an email or domain, locate it in the list and press the ⨉ icon next to it. After that, click Save and Finish.
Note! If you give someone access, we don't send them any invitation email. We only make it possible for them to authenticate and view your books. If you want to invite them, you have to email them separately.
Manage authorized readers by uploading a file
Instead of managing addresses manually, you can also prepare a list of email addresses (or domains) in CSV or TXT format. This option is especially useful when you need to provide access to a large audience. You can upload lists containing up to 100,000 email addresses or domains. Here are the steps to do it:
- In your list of flipbooks, click on the Customize icon after the publication name.
- Scroll down to the Privacy section and click on it to unfold the options.
- Select the Restricted Access setting. Enterprise plan clients see a selector where they can choose Email/Domain or SSO. Select Email/Domain.
- Click on the Manage Access button.
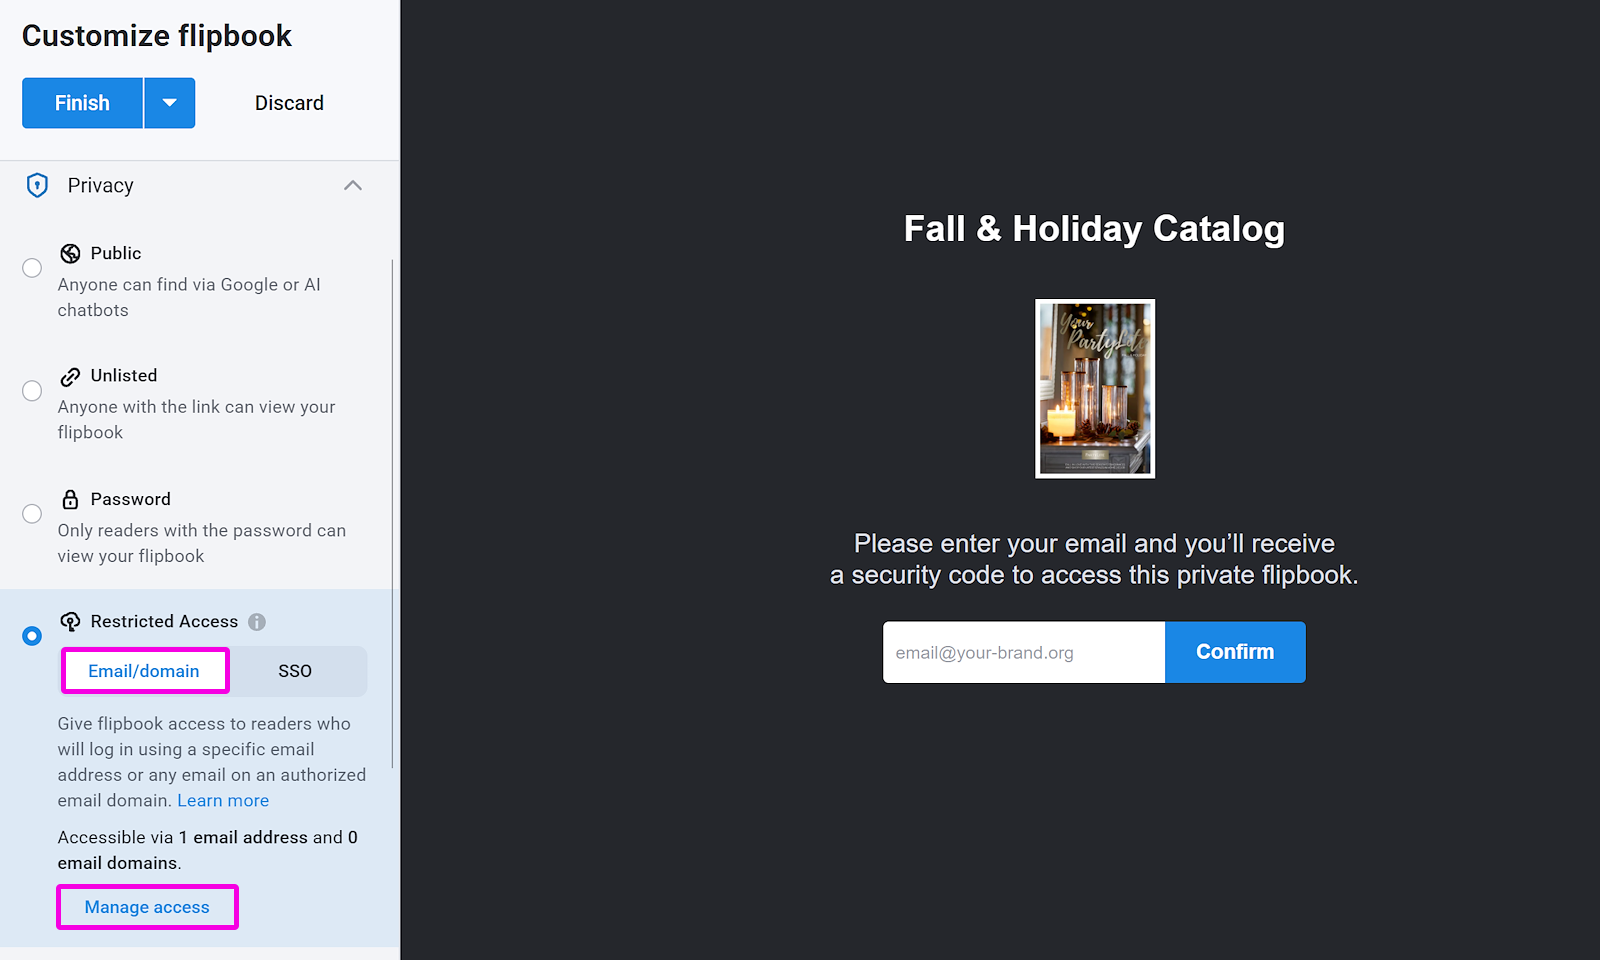
- In the pop-up window, select Upload a File. Drag and drop your CSV or TXT file containing the list of readers, or click Browse to select a file from your device. Make sure your file is no larger than 20 MB, and that commas, spaces, semicolons, or line breaks separate the entries.
Tip! We advise using a file with one email address per line, separated by line breaks. If your list contains a mix of email addresses and email domains, we advise starting with the domains and putting the individual addresses after them, so you can keep track of how many of both there should be.
- The upload process will start automatically. Once the upload is complete, the number of domains and email addresses will appear below the list name. Verify that the numbers match the numbers in your list.
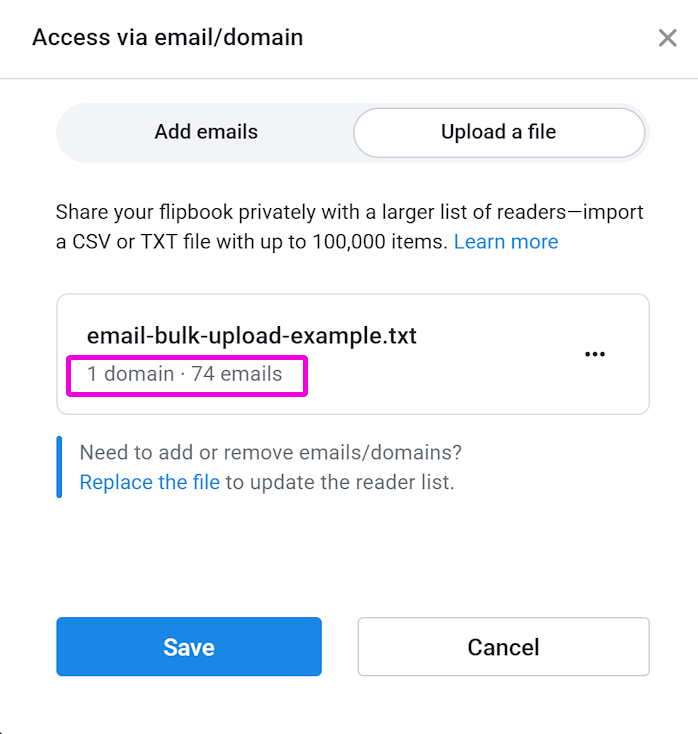
-
If there are any errors in your list, you'll see a warning message. Refer to the next section to find out how to fix them.
-
If your list has been imported successfully, click Save, then press Finish to save this Email/Domain authorization type to your flipbook.
After you upload the list, you cannot make any modifications in your account directly. To add or remove users or correct mistakes, you will need to upload a new list. We have added the following options for managing lists. Hover over the list name and click on the 3-dot icon to access them:
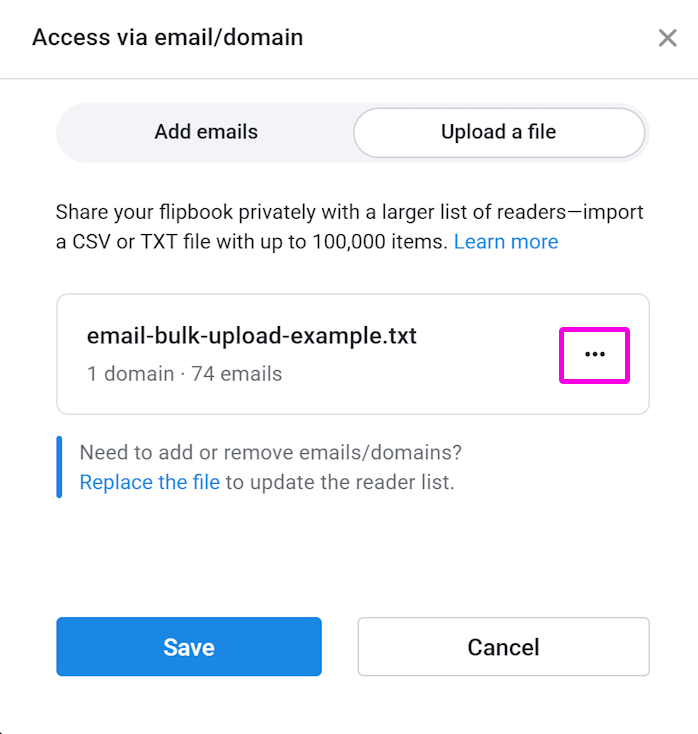
- Replace file – upload a new file to replace the current list of readers.
- Download file – download the file to review, edit, or save for future use. Note that this is not the file you uploaded, but the results that we obtained from it.
- Delete file – remove the current list of readers.
If you have replaced or deleted a critical list with no way to recover it, contact our Customer Support. We keep previously used lists for 30 days.
Note!If you upload an access file, we don't send the people in the file any invitation emails. We only make it possible for them to authenticate and view your books. If you want to invite them, you have to email them separately.
Troubleshooting and Requirements for Your Readers List
When adding a reader list to restrict access, make sure the following requirements are met:
- Use a TXT or CSV file.
- Keep the file size at 20 MB or less.
- Include no more than 100,000 email addresses or domains.
- Separate items with commas, spaces, semicolons, or line breaks.
If any of these requirements are not met, or if another issue occurs, you may encounter one of the following error messages:
- Something went wrong. Please try again in a few moments.
The server encountered an error while updating your list. This issue is temporary, so try again a bit later. - Invalid file format. Please select a CSV or a TXT file and try again.
Check the format of the list you are trying to upload. The file must be in CSV or TXT format. - Incorrect file formatting.
Make sure commas, spaces, semicolons, or new lines separate your items. Check your list to ensure that all items are separated correctly. - You’ve exceeded the limit of 100,000 emails or domains.
Remove the extra items until your list is within the limit. - We successfully imported XX emails/domains from your file, but some entries couldn’t be added. This often happens because of typos or missing characters in your file.
Check your list to ensure that all items are separated correctly and that all email addresses and domains are entered in a valid format. For example, use myemail@mydomain.com for email addresses and @mydomain.com or mydomain.com for domains.
In addition to technical errors, you may also encounter situations where the number of emails is lower than the number in your uploaded list. The most likely reason is that your uploaded list contains duplicate email addresses. You can import your CSV file into, e.g., Excel and use Data > Remove Duplicates. Our support team will be glad to help if you cannot figure out why the numbers don't match. Email us or book a demo with a specialist.
Applying restrictions to several flipbooks at once
If you want to apply the same access restrictions to several flipbooks at once, then you can do that as follows:
- Make sure you have the list of emails to authorize available. If you want to use the same list that you use for one of your current publications, then go to the protection settings of that flipbook.
- If you specified them manually, click on the Copy icon.
- If you uploaded a file, you can download it using the 3-dot icon ... and select Download file.
- In the flipbook list on the main page of your account, select all the flipbooks you want to apply these settings to.
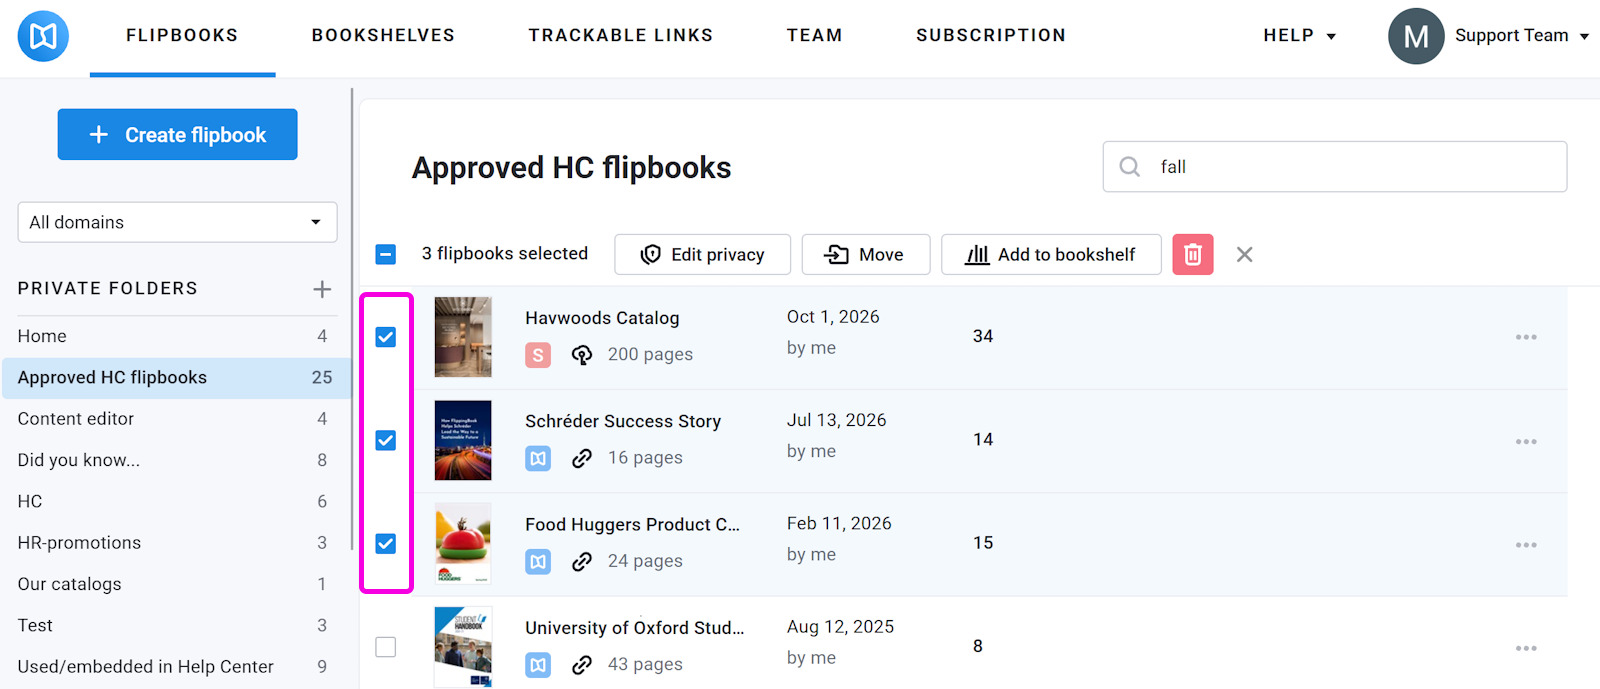
- Click on the Edit Privacy button and select Restricted access:
- If you copied a manually entered list, paste it in the data entry box.
- If you use a TXT/CSV file, select Upload a file. Then click Browse and select your file or drop it onto the drag-and-drop area.
- Click Save.
Setting Default Email/Domain Restrictions
If you want all new flipbooks you create to be restricted, you can set restricted access to authorized emails and domains as default. To do this, configure this type of access for your flipbook, and tick the Make settings default for future flipbooks box before hitting the Finish button, as we explain in the Can I save my flipbook setting as default? article. Note that the users who have currently been granted access are saved as the default group too!
You can also use this to quickly set the same list of authorized users to all flipbooks in a folder, without affecting future books! Select the Save Settings as Default option and, in the pop-up window, only tick the Apply to all flipbooks in the current folder and press Save.
Opening flipbooks with restricted access
Once your readers open your flipbook with restricted access, they will need to enter their email address and, after that, the 6-digit code they receive by email. If correct, we grant access to the flipbook.
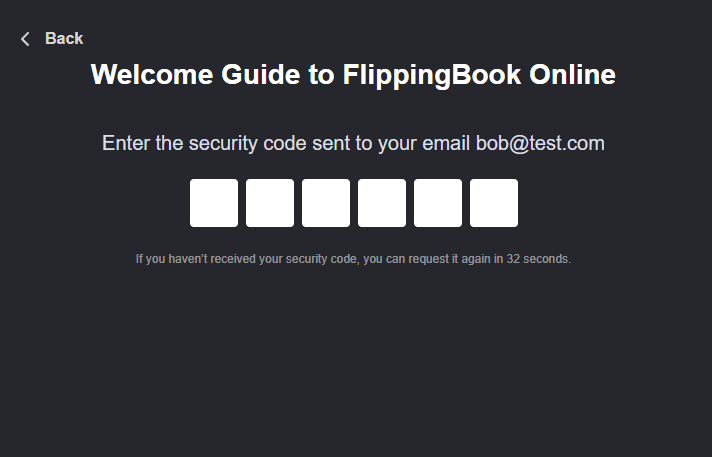
When your reader has confirmed their email address, they can keep opening this and other email-restricted flipbooks shared with them on this device for 30 days. After 30 days, they will again be asked to confirm their email address.
Tip! If you share a flipbook link with restricted access, remind your readers to check their spam or junk folder if they don’t receive the authorization code.
Access via Single Sign-On (SSO)
As an alternative to authentication by email/domain, we also offer access via SSO, but this is available only in FlippingBook Online Enterprise. It can be convenient, as it won’t require any code to enter to open a flipbook. The information about how to set it up is available in our articles below:


