Working with folders
Your FlippingBook Online account offers the possibility to create folders. Folders are a great way to organize your flipbooks, especially if you have a lot of them. For example, you can create separate folders for newsletters, catalogs, and proposals. Or if you create flipbooks for several clients or departments, you could create separate folders for those.
But that's not all! Folders also offer an easy way to style your publications! You can modify the settings for one publication and apply them to all other flipbooks in this folder. This allows you to create a coherent look for all flipbooks in that folder. In this article we cover the following topics:
- The difference between Private folders and Shared folders
- Your Home folder
- Creating new folders
- Creating flipbooks in specific folders
- Moving flipbooks between folders
- Renaming and deleting folders
- Searching publications in folders
- Styling publications in a folder
Private and Shared folders
There are two different kinds of folders:
- private folders and
- shared folders.
Flipbooks in private folders can only be changed by you. The flipbooks themselves will still be visible to the whole world (or at least, to anyone who has the link). The word private here applies to who can change these flipbooks, not who can see them. If you have a single-user license, then all your folders will be private folders.
If you have a multi-user account, then you can take advantage of shared folders. Shared folders (and the flipbooks in them) are visible and editable by all users in your team.
In this article, we describe all the ins and outs of folders in general. The extra possibilities of shared folders are described in a separate article, How to work together on flipbooks with teams.
Working with folders
Home folder
Every FlippingBook Online user has a Home folder. When you log in to your FlippingBook Online account, we show this folder. And if you haven’t created any folders yet, then all your flipbooks will be located in your Home folder.
Creating a new folder
To create a new folder, simply press on the + sign next to private folders or in the Add folder line. Give your folder a suitable name and you’re done. 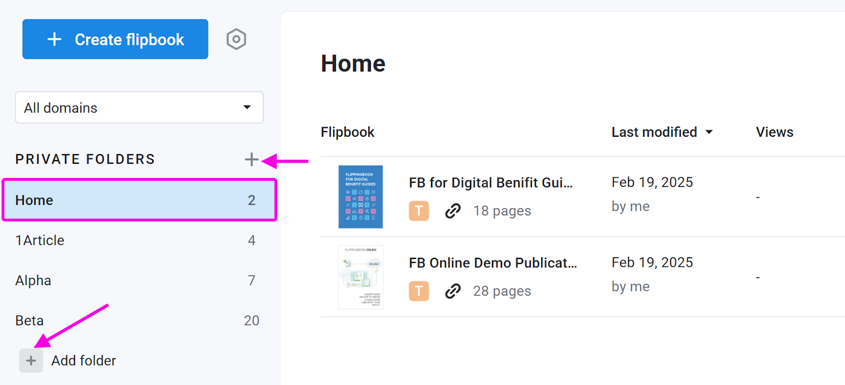
Your new folder is created. In the screenshot above, we have created a folder called Catalogs. The 0 behind it indicates that there are no flipbooks in the folder yet. You can now select the folder and will see that it is empty.
You can now populate your folder in two ways:
- By creating new flipbooks in this folder
- By moving flipbooks from other folders to this folder
Creating new flipbooks in a folder
You can create flipbooks by pressing the Upload PDF button. Your new flipbook will be created in the folder that is currently selected. When you log in to your account, by default, this will be the Home folder. So this is the most common place for your new flipbooks. But if you first select another folder in the folders' panel on the left-hand side and then press the Upload PDF button, the flipbook will be created directly in the folder that you have selected.
Moving flipbooks to folders
There are several ways to move your flipbooks to a folder. If you want to move a flipbook from, say, your Home folder to your newly created folder, you can:
- Open your Home folder and simply drag-and-drop the flipbook to the destination folder: click on your flipbook, keep the mouse button pressed and move it to your folder, and release the mouse.
- Alternatively, you can select the flipbook you want to move and click on the More icon.
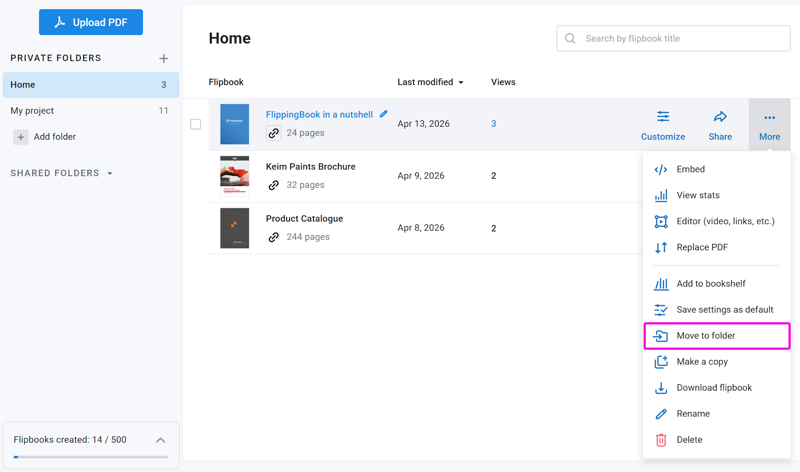
Then choose Move to folder. This will open the Move your flipbook dialog. Choose the destination folder from the dropdown menu and press Move.
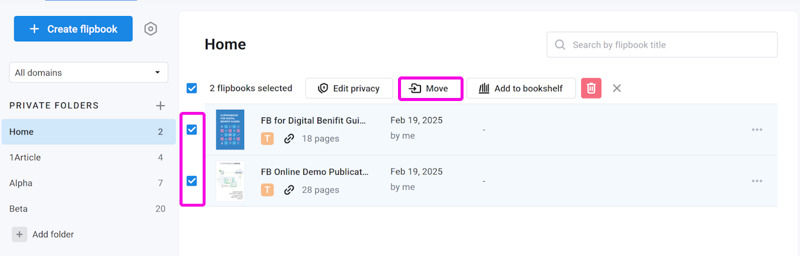
It’s also possible to move several flipbooks at once.
- Select the first flipbook by moving over it and clicking on the checkbox before the name
- Select the other flipbooks that you want to move. (There is no need to click exactly on the checkbox now - you can also click on the thumbnail now)
- Simply drag and drop the multi-selection to the destination folder or click on the Move button and then select the destination folder.
Renaming and deleting folders
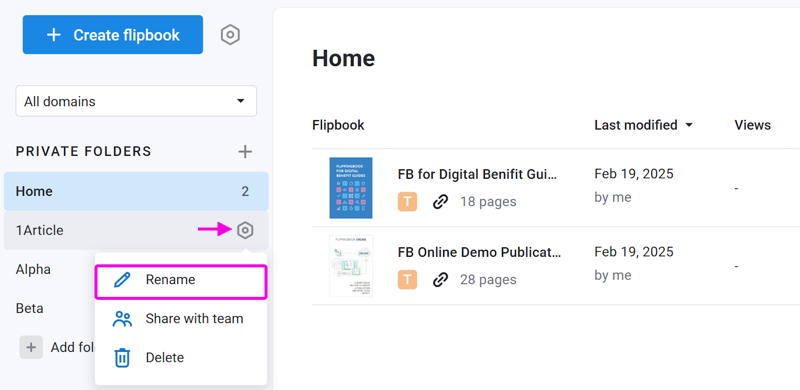
Of course, you can rename your folders to give them a more meaningful name and delete them entirely if you no longer need them. When you hover over the folder, you will see that the number (which indicates how many flipbooks are in that folder) will turn into a cogwheel. Clicking on the cogwheel reveals the options to rename or delete.
When you delete a folder, the big question is of course what to do with any flipbooks that may still remain. Therefore, you will be presented with a choice to move them to another folder (and select which one in particular) or to remove them completely. 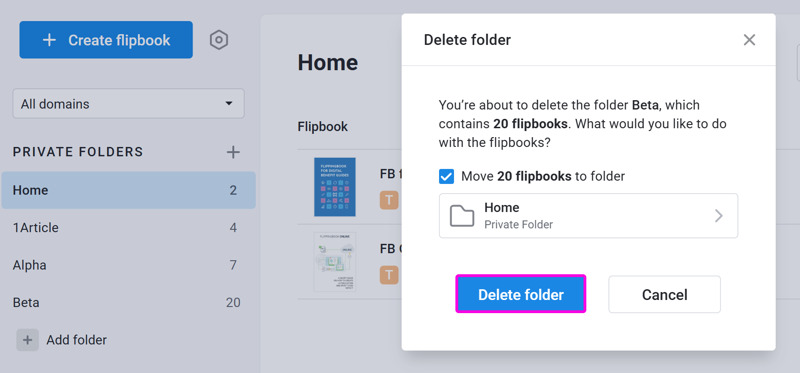
To remove the flipbooks completely, you will need to clear the checkbox before the Move <x> flipbooks to folder. Beware though: this is irreversible and there is no recycle bin. When you confirm that you want to delete these flipbooks, they’ll be gone forever.
Finding your publications
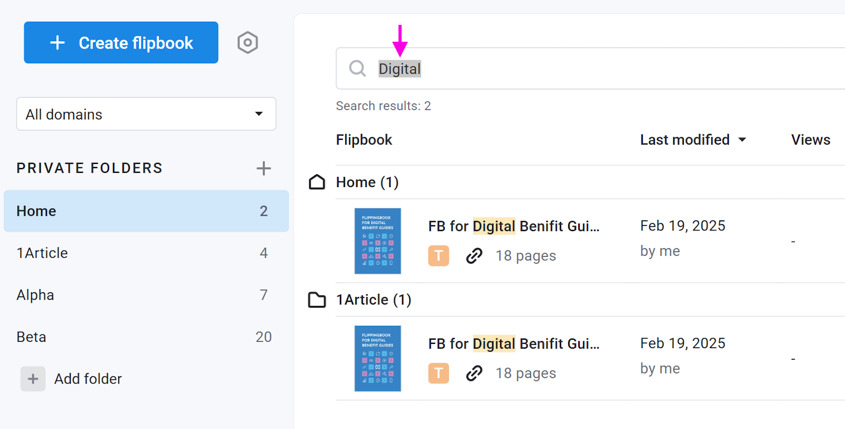
You don’t have to be afraid that you won’t be able to find your publications after creating multiple folders. Our search function will look for flipbooks in all folders that you have created. And we’ve got you covered even if you’re really only interested in the current folder. If you search for a term, then our search window will first show any flipbooks which include your search term in their names in the current folder, and then any matches in other folders.
Applying settings to all publications in a folder
One of the benefits of folders is that you can easily apply the same settings to all publications in a folder. This includes things like background, colors, logo, favicon, menu-options, hardcover, and more. This way you can give all flipbooks about a similar topic the same look-and-feel, yet apply different settings to flipbooks in other folders. To do so:
- Fine-tune the settings for one publication in your folder to perfection.
- Hover over the flipbook and click on More.
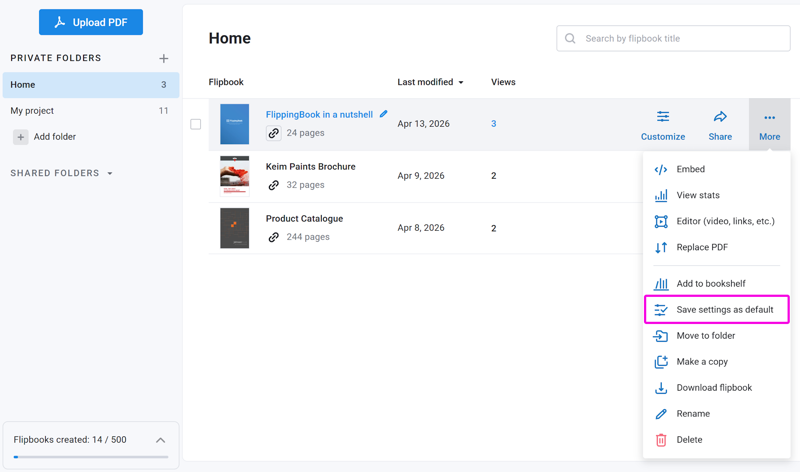
- In the dropdown menu, click on Save settings as default.
- Tick the checkbox Apply to all flipbooks in the current folder.
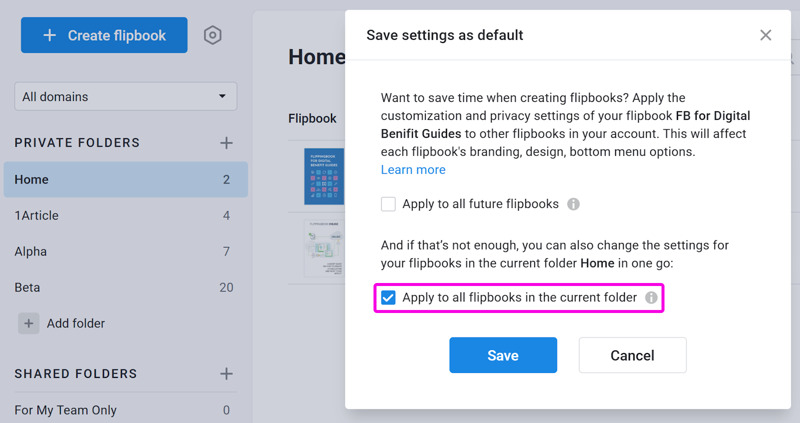
- Press Save.
Note that this is a one-time operation. If you create any new flipbooks in this folder in the future, your default settings will be applied. If your default settings differ from the settings that you created for this folder specifically before, then you will have to repeat this procedure, so that these settings will also be applied to your just-created publication.
Related articles
If you have a FlippingBook Online Team or Enterprise license, then you can also use Shared folders to collaborate with your team members.