How to make your own GIFs?
FlippingBook Online Advanced or higher allows you to add GIFs to all flipbooks you create with it. The same is true for FlippingBook Publisher Business. Sometimes we get requests from clients who need assistance in creating GIFs. While the feature is intended to add existing GIFs, we’re happy to share some tips on how you can create a new one from scratch.
A word of warning
Creating professional animations is not easy. When it comes to regular images, everyone can take a screenshot or a picture with their phone. Quality may vary, but at least you have something quickly.
Animations are different. There are lots of tools to create animations, but making complex professional animations is firmly in the realm of professional designers. These tools generally require specialist knowledge. Therefore, we would suggest consulting with your designer first if you have one at hand.
With that being said, let’s get started on:
- How to create a GIF in Canva
- How to animate regular images in GIPHY
- How to convert a video to a GIF
- How to find GIFs on Google if all else fails
How to create a GIF in Canva
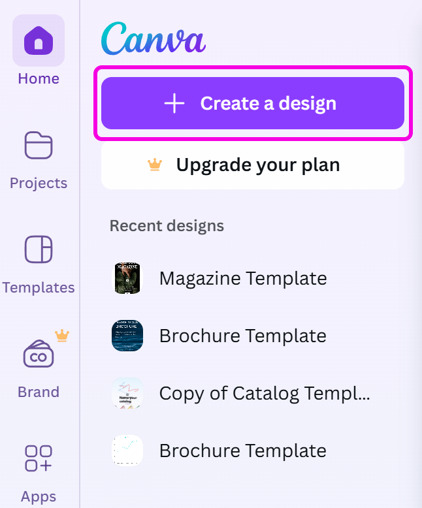
- First of all, make sure you have an account in Canva or register a new one.
- Open this account and press the Create a design button in the top left corner of the page:
- Choose Animated Social Media.
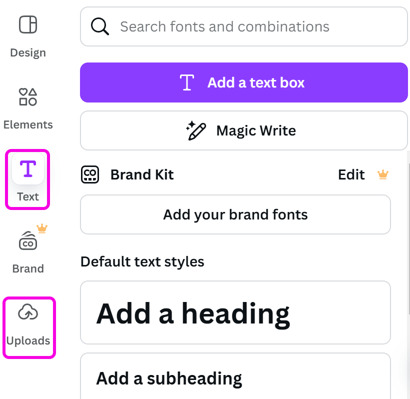
- While in the editor, upload any images or videos you like by choosing Uploads on the left-hand side of the page.
- Add text to your GIF to explain what this GIF is about as a reference:
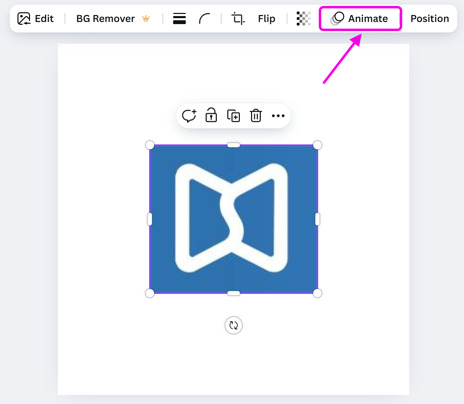
- Click on a particular element of your project that you want to animate. In our project, one of such elements is the logo of FlippingBook.
- After that, select the Animate option to choose a motion style:
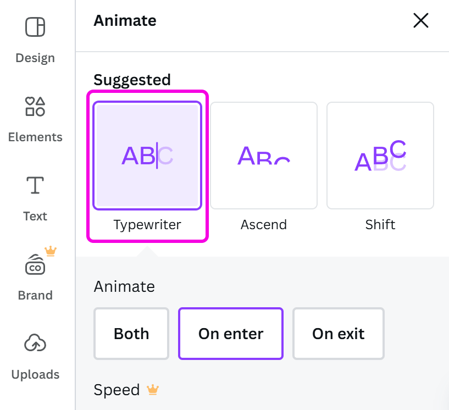
- Pick any of the listed animations you like. As for our GIF, we used the Typewriter style:
- When your GIF is ready, check the preview by clicking the play button in the bottom left corner.
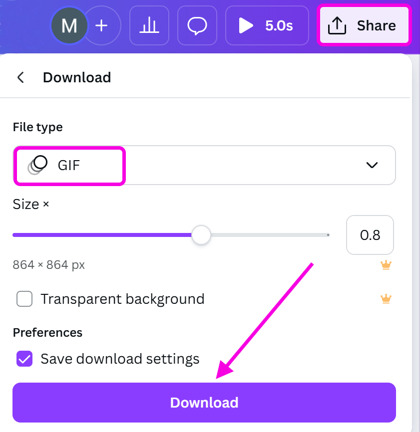
- To download your GIF, click on the Share option, choose Download, and the file type GIF, and press the Download button:
Once your GIF is ready, it’s time to enrich your flipbook with it and make it work to the fullest.
And this is just one single example: Canva has lots of interesting animations. We heartily recommend you experiment with different settings to achieve the result that you like best.
Make simple animations from regular images with GIPHY
Giphy is one of the leading platforms to download GIFs from, but you can also animate static images to add a bit of spice to your flipbooks. We advise using clearly defined images, like icons, pictograms, emojis, or line drawings, as these tend to give the best results, but feel free to experiment!
For example, let's say that you want to add an animation to the environmental paragraph of your annual report. Here's how you can turn an image like the one on the left into the animation on the right in a few clicks with GIPHY.
 |
- Go to GIPHY Create and choose Sticker. Then upload your source image.
- Click the Magic Wand button to remove the background and Continue to Animate.
- Select the motion effect that suits your image best. We used 'Tilty,' so our leaf swirls in the wind.
- Optionally, add a stroke to outline your image so it contrasts on your background.
- Click Continue to Upload.
- Add tags and choose whether to make it public or private. Click Upload to GIPHY—your GIF is ready to download or share!
- Simply copy the link to your GIF and paste it into the FlippingBook Editor. Or download the GIF to your device so you can upload it in FlippingBook.
How to convert videos to GIFs
If your animation is in MP4 format, and uploading it to YouTube is not an option, then you could consider converting it to GIF. Especially if the video is short, has no sound, and the loss of quality is not much of a problem.
An ideal example is this video:
| The original video as an MP4 | The converted video as a GIF |
The original MP4 file is 3.3 MB. The GIF version you see above is 5.8 MB. Both the quality and the size are excellent for a GIF. For most videos, you should expect worse quality at a bigger size. What makes this video so well-suited for converting it to GIF is the relatively simple imagery: clearly defined objects and a very limited color palette.
So how do you create this GIF?
- Go to the video-to-GIF page on EZGif.
- Press the Choose file button and select your local video file. You can also use a video that is already uploaded online. Simply copy its URL. Then press the Upload Video button.
- Change the End time and press Convert to GIF. Note that the frame rate and allowed time are connected - higher quality means a higher frame rate. The higher they are, the shorter the video can be.
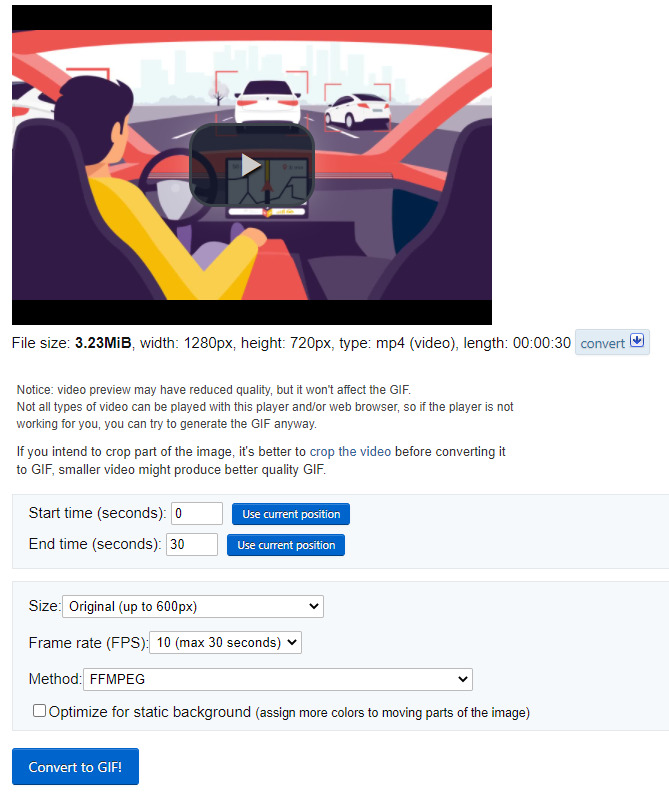
- Press Convert to GIF!
After a few seconds, you’ll see a preview of your GIF. But note that the size is 10.3 MB, not the 5.8 MB that we promised.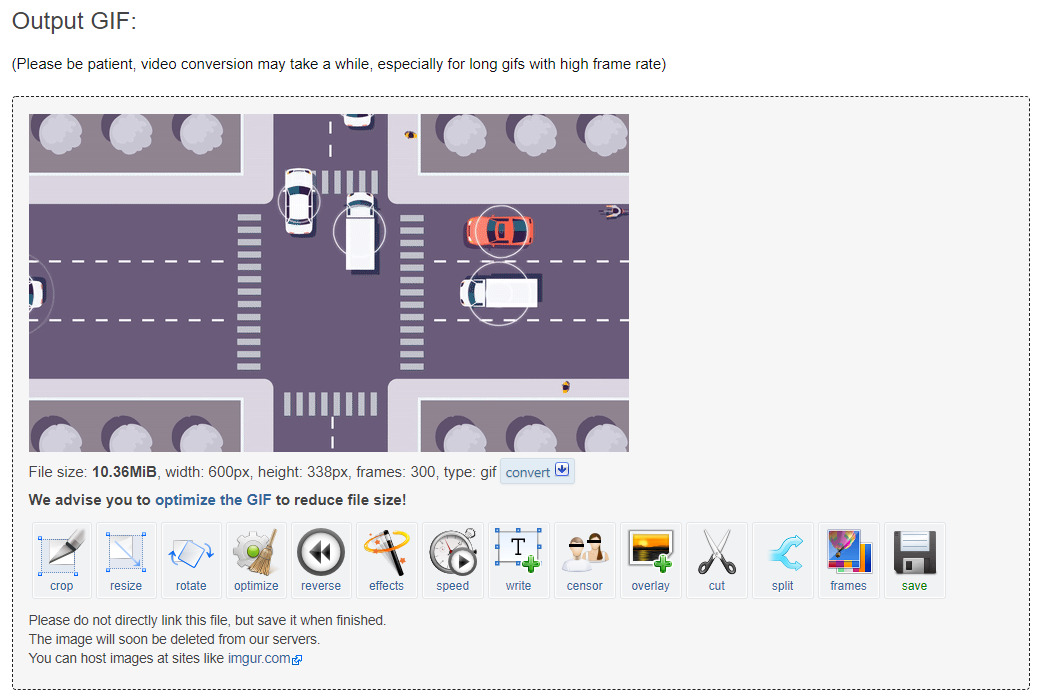
- To reduce the size, press the Optimize the GIF link
- On the next screen, just use the recommended settings and press Optimize GIF. After it’s optimized, you can press the Save button and insert your GIF in your flipbook.
How to find them on Google Search if all else fails
If creating your own GIFs feels like it’s beyond you, then Google is your friend. Google can be used to find anything, including GIFs. Search as usual on Google and then click Images. To track down GIFs, in particular, go to Tools, then go into the "Type" dropdown and select "GIF." You’ll now see a page full of GIFs to pick through. Not 100% of the results are animated, but most are, so you can find a few gems. Beware of copyright, though!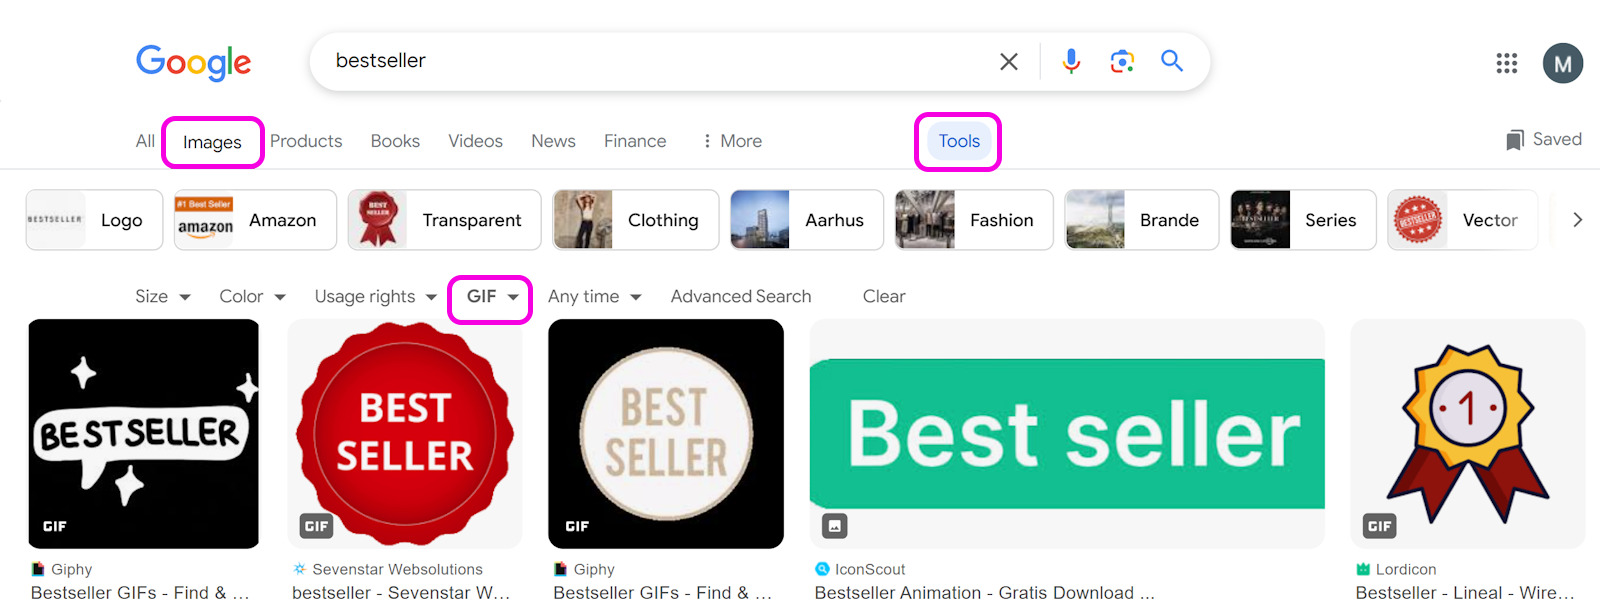
We hope that we have given you some useful tips on how you can make GIFs, as well as some inspiration on how you can use them in business documents. Good luck creating your own GIFs!
Related articles:
- How to embed GIFs in FlippingBook Online (Advanced and higher)
- How to embed GIFs in FlippingBook Publisher (Business edition)