Can I make my flipbook look like a real book?
You can customize your flipbook to look more like a real book by applying Hardcover, Book Thickness, and Shadow Depth features.
Hardcover and Book Thickness are available in Starter and higher plans. Shadow Depth feature is available in all plans.
- How do I apply the Hardcover feature to my flipbook?
- How do I apply the Book Thickness feature to my flipbook?
- How do I apply the Shadow Depth feature to my flipbook?
- Related articles
Note! ⚠️If the Page Turn Mode is set as "Slide", the Hardcover, Book Thickness, and Shadow Depth will not be visible. They will reappear if you decide to switch back to "Flip" mode.
How do I apply the Hardcover feature to my flipbook?
The Hardcover feature allows you to change the appearance of the first and last pages of your flipbook to resemble a real printed book. This looks great on e-books, but it can also enhance the look of your catalogs and brochures.
Also, this feature adds a small hard edge around the inside pages adding to the broad impression of the print-like book.
To enable the Hardcover feature, follow these steps:
- Open the list of your flipbooks.
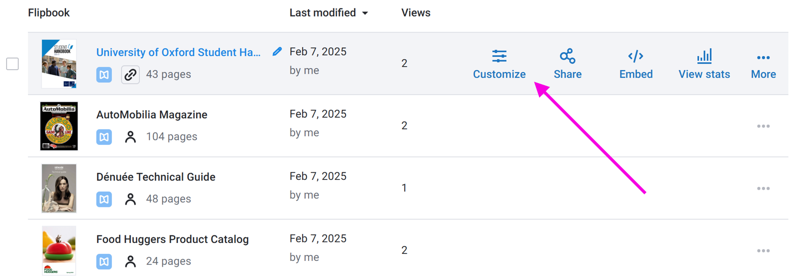
- Hover over the flipbook you'd like to change and click on the Customize option:
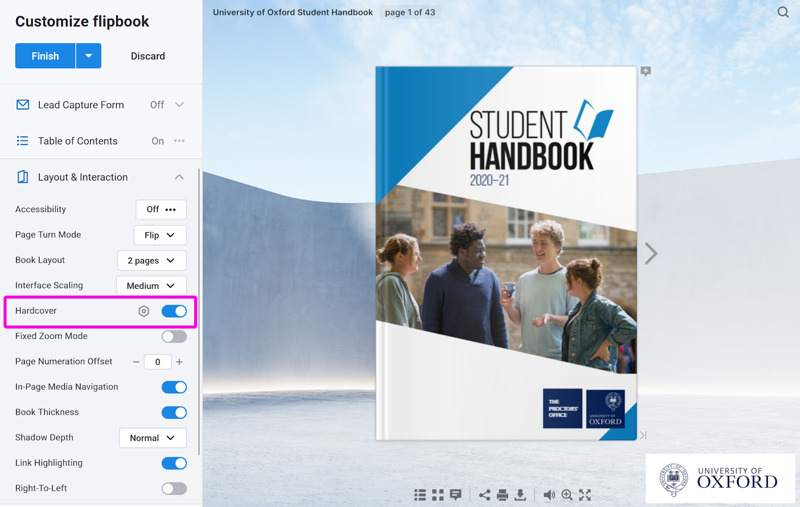
- Click on the Layout & Interaction group to expand it and enable the Hardcover option:
- Apply the changes by clicking the Finish button in the top left corner of the Customize menu.
After enabling the Hardcover feature, you can also customize the color of the inner edge. This feature comes in handy when the edge of your flipbook isn't clear or doesn't match the front page for any reason.
To customize the edge color, click on the cogwheel ⚙️ icon next to the Hardcover feature
In the pop-up window, pick the color of the inner edge of your publication (or type the six-digit color code of it in the box below the colors):
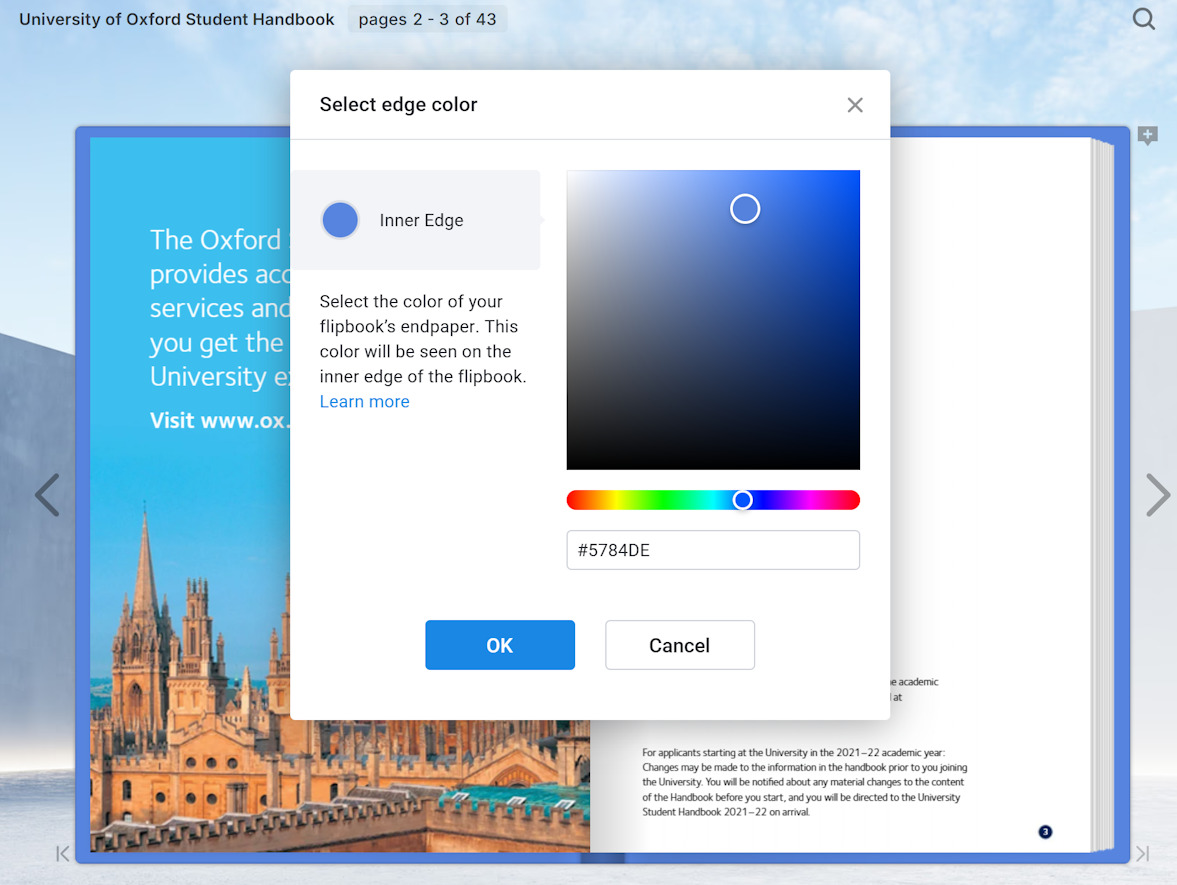
Hit OK to accept your changes. Press the Finish button to save changes.
Here you can compare how the flipbook looks with the standard inner edge (light grey) and with a customized one (blue):
As you can see with a new hardcover edge color your publication looks more noticeable.
- No back page with an even number of pages: If you have an even number of pages, and the last page is not designed as a back cover, it looks a bit silly.
- No back page with an odd number of pages: If you have an odd number of pages, you won't be able to close your flipbook as there's no last page at all.
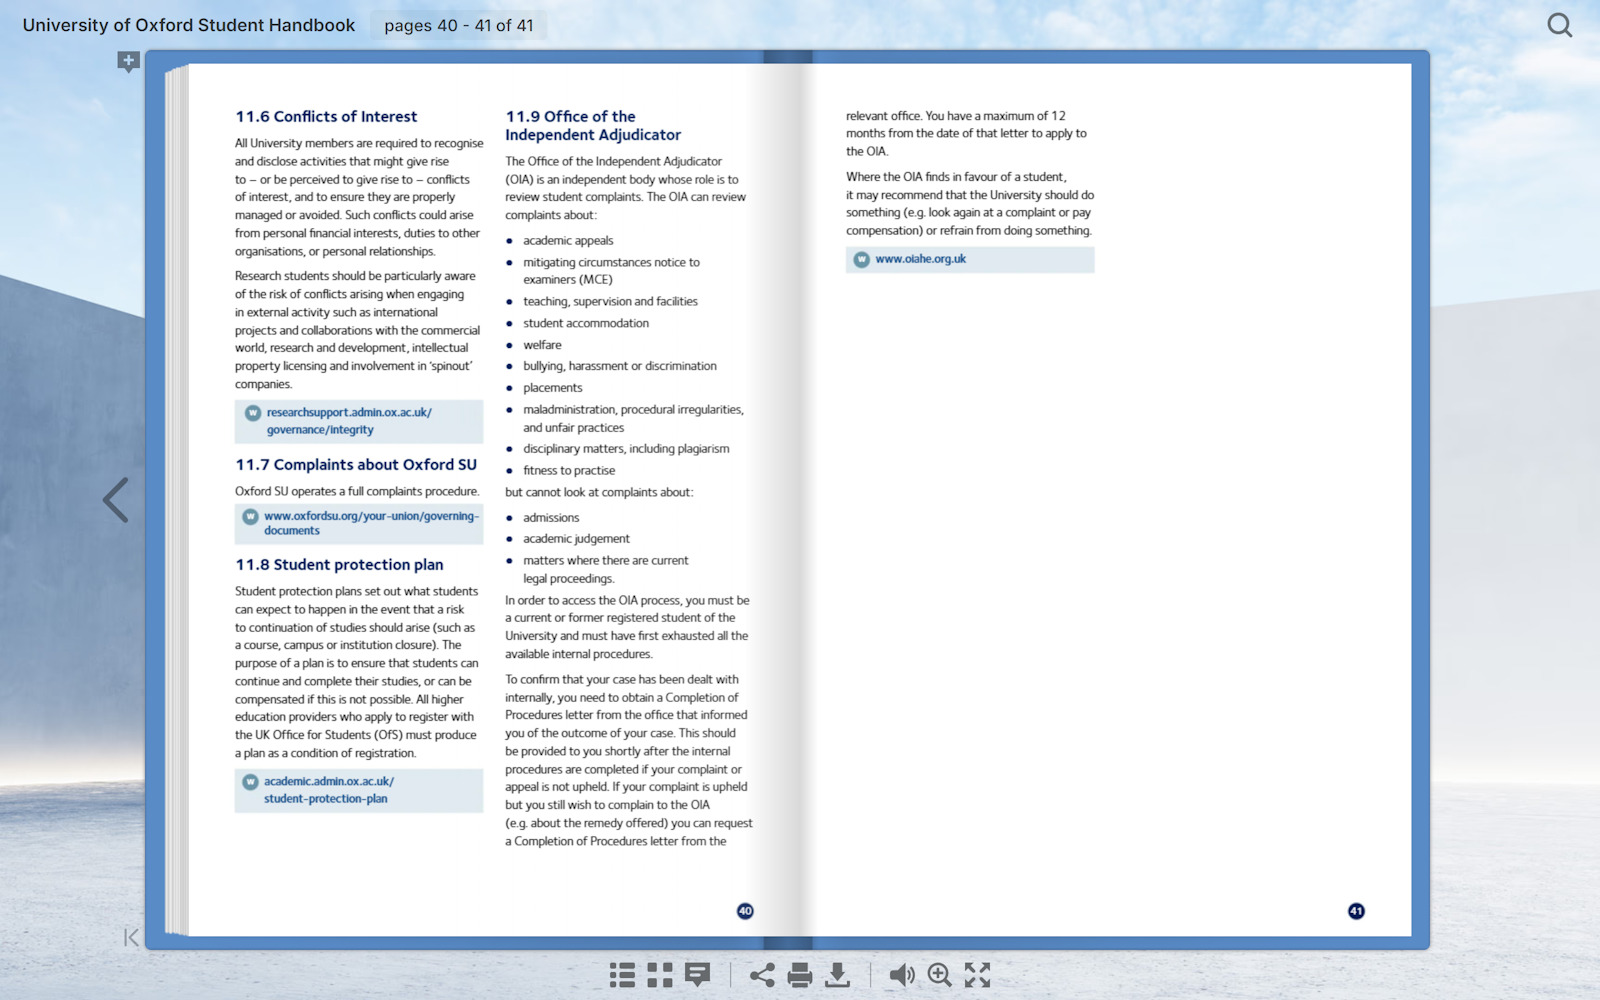
Both issues can be solved by adding empty pages at the end of your PDF and replacing them:
- When the PDF has an even number of pages, add two empty pages at the end.
- When the PDF has an odd number of pages, add one empty page at the end.
Even though you can't just add a page in FlippingBook Online, there's still a way to add a blank page into your PDF and replace it without breaking a link to your flipbook (also available in Starter and higher plans).
Note! 💡You can use the Adobe Acrobat software or special online tools to edit your PDF. Don't forget to download a blank page first!
How do I apply the Book Thickness feature to my flipbook?
Similar to the Hardcover feature, Book Thickness gives your flipbook a more realistic and print-like feel. The thickness even changes dynamically when you flip the pages.
However, it is not just a visual enhancement. The Book Thickness feature allows you to quickly go to a specific page in your flipbook by clicking directly on its edge.
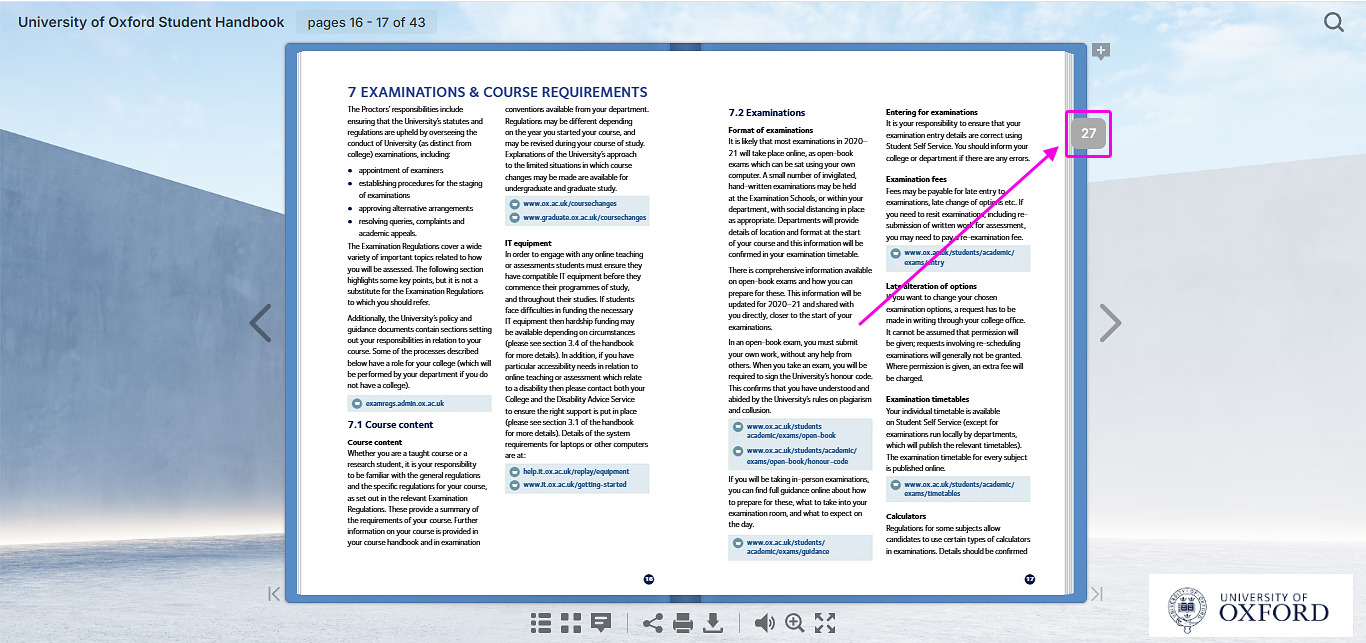
You can enable the Book Thickness feature without any restrictions, though it will only be visible if your flipbook has more than 10 pages. To do that, follow these steps:
- Open the list of your flipbooks.
- Hover over the flipbook you'd like to change and click on the Customize option:

- Click on the Layout & Interaction group to expand it and enable the Book Thickness option:
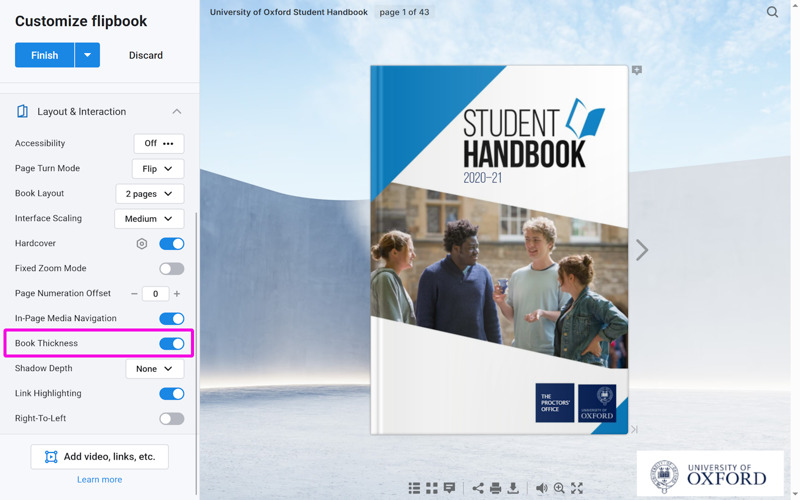
- Apply the changes by clicking the Finish button in the top left corner of the Customize menu.
Note! ⚠️ Book Thickness functionality is a bit limited on mobile devices📱. You won’t see it at all in your mobile browser portrait (vertical) mode and won’t be able to quickly go to the page by tapping on its edge in landscape (horizontal) mode. The reason for this is that we’d like to save as much screen space as possible to display the actual flipbook content. Besides, mobile screens lack the precision of the mouse on desktops making it hard to tap on the right edge of the page.
How do I apply the Shadow Depth feature to my flipbook?
Shadow Depth lets you set the depth of the shadows on the pages, enhancing the realism of your flipbooks.
You can choose between Light, Normal (which is set by default), and Deep. Also, you can disable it by choosing None.
To customize the Shadow Depth feature, follow these steps:
- Open the list of your flipbooks.
- Hover over the flipbook you'd like to change and click on the Customize option:

- Click on the Layout & Interaction group to expand it and set the Shadow Depth by choosing one of the options on the dropdown:
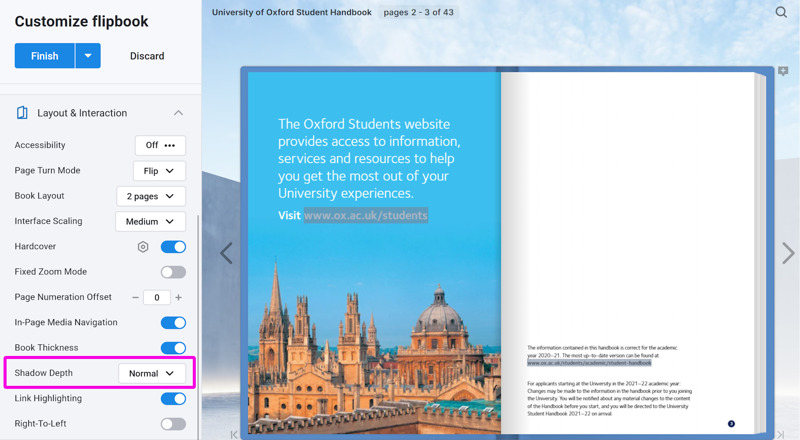
- Apply the changes by clicking the Finish button in the top left corner of the Customize menu.
Related articles
In addition to Hardcover, Book Thickness, and Shadow depth features, there are various customization options available to make your flipbook resemble a print-like book. Consult with our article on what customization options we have available to know more about it.