Exporting Reports for your Flipbooks
With FlippingBook Online, you can easily manage settings and track statistics for each individual flipbook. But what if you want to export data about all your flipbooks at once — whether with stats or just a full overview of all flipbooks that you have in your account? That’s possible too. You can download several reports directly from your account.
You can decide how detailed this report should be based on your needs. It can either give a simple overview of all your flipbooks (name, privacy type, folder, creation date, lifetime views):
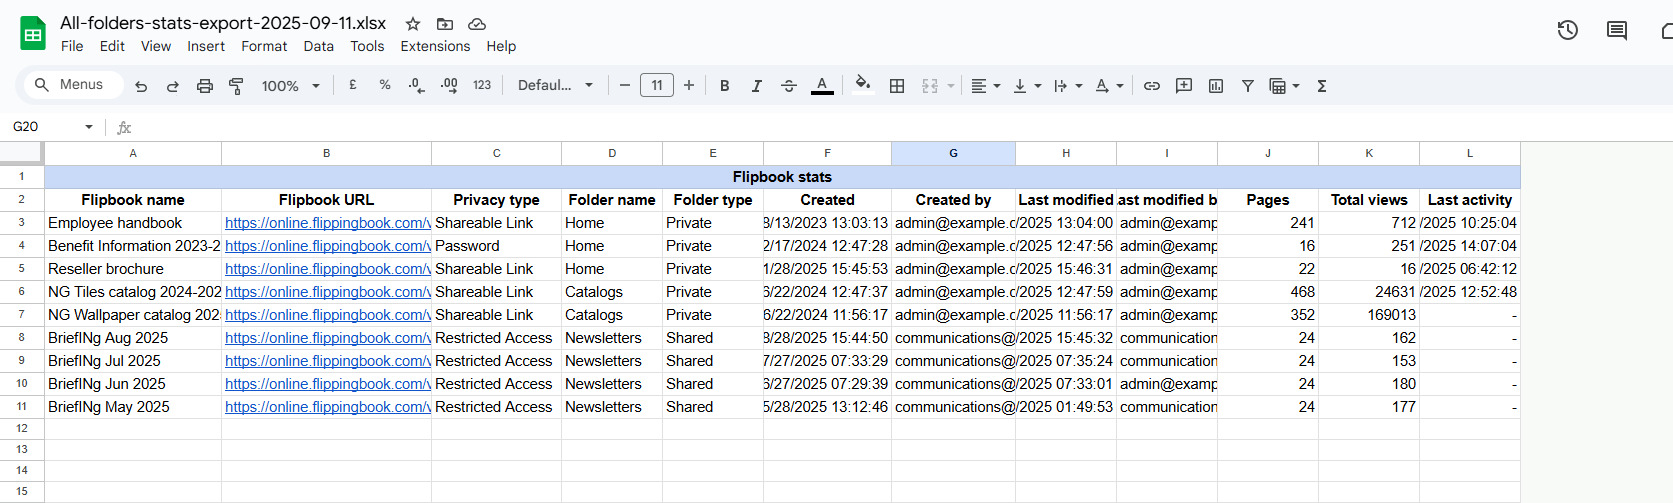
Or the same report with the addition of detailed stats of your flipbooks, such as views, visitors, downloads, link clicks, leads collected, and more:
For a detailed explanation of the meaning of all stats, check out our article What can I track with my Stats page? Note that the exact contents of the report vary slightly, depending on your plan. For example, we only include the Created by column in multi-user plans.
While individual stats help you understand how a single flipbook is used, consolidated reports show you the overall picture of your publishing efforts. They’re especially useful for:
- Marketing and campaign tracking to see which campaign drives the most engagement overall.
- Team or department performance reports to know how the whole team’s content performs.
- E-commerce and product catalogs to track which catalogs get the most views/downloads.
- Publishing and education to find out which publications students/readers engage with most.
Here’s how you can export a report for your flipbooks from your account:
- Hover over the folder on the left that you want the report for, click the cogwheel, and select Export Stats.
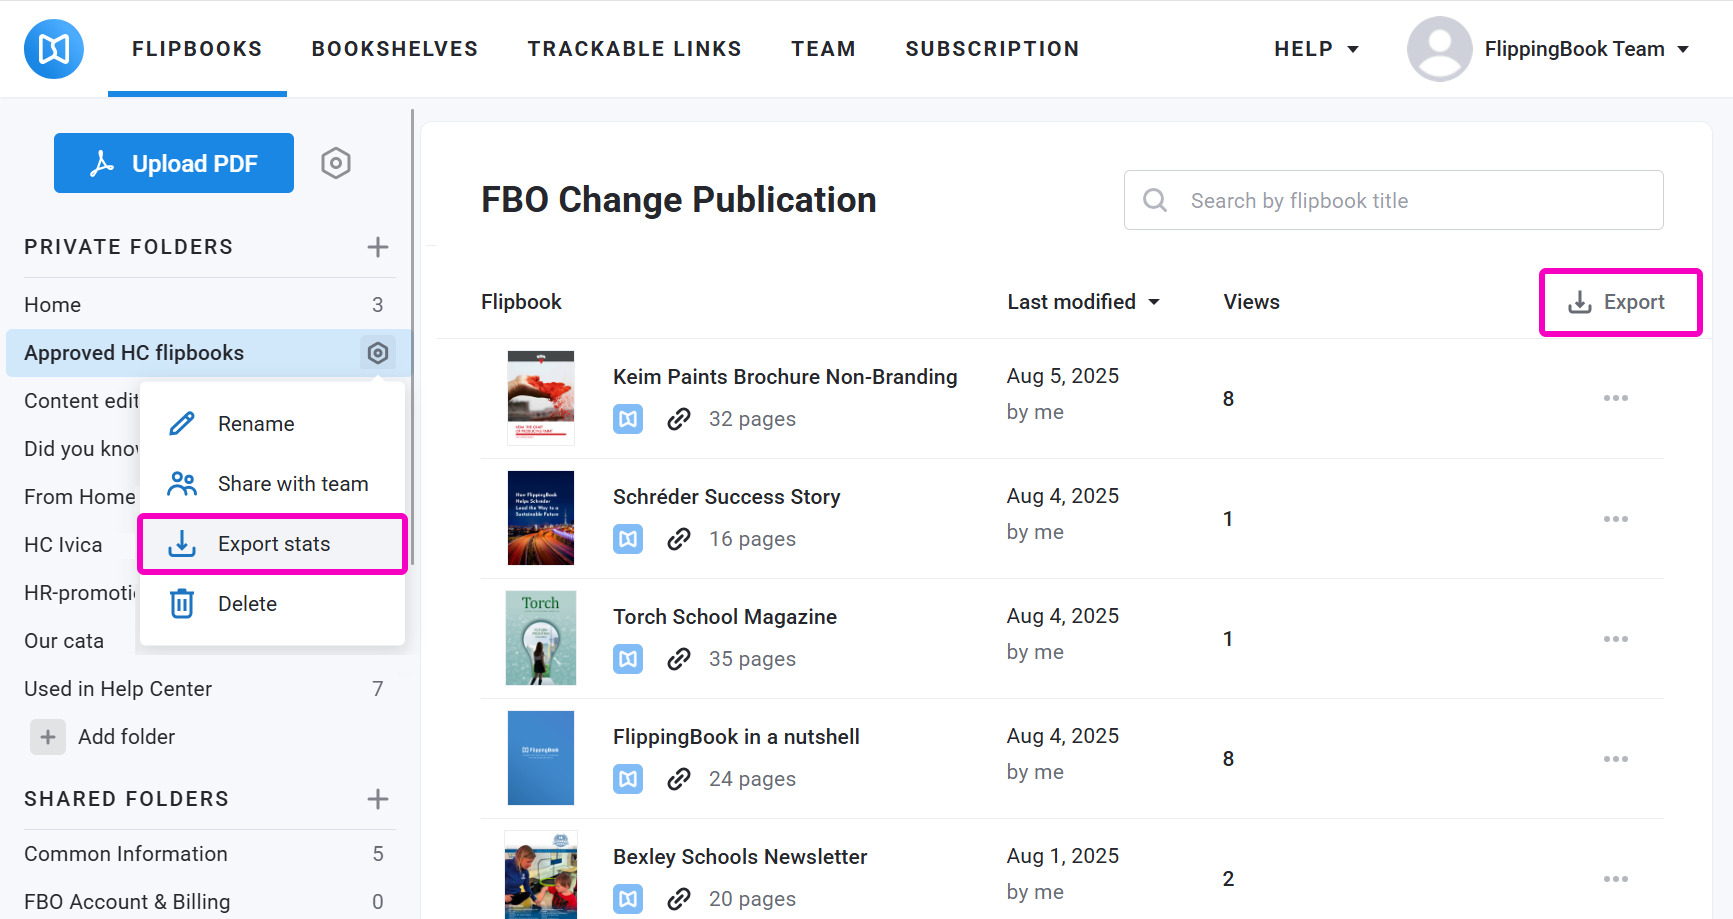
If you want to export a report from your Home folder, click the Export button next to the list of your flipbooks. - The Export flipbook stats dialog will open. In the Select flipbooks in setting, you can either keep the current folder or include All folders in your report.
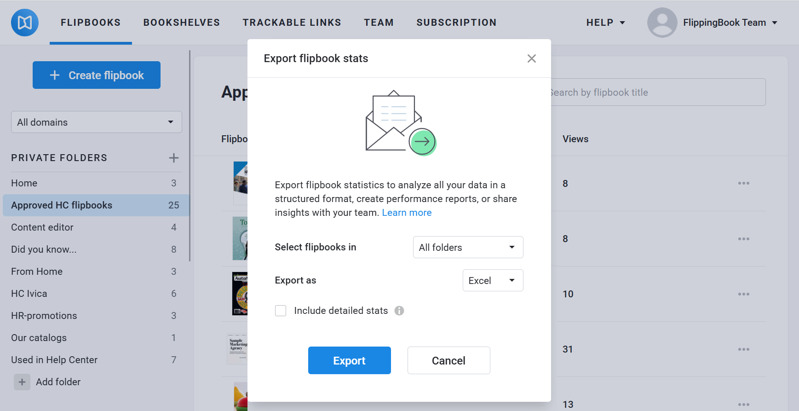
Reports for All folders include all the folders accessible to you. For single-user licenses, this means all flipbooks in your account. For Team and Enterprise users, data about publications in Private folders of Team members is not included. Only the license owner can download full reports with all data in the Team section. - Choose the file format for your report: Excel (default) or CSV.
- To include detailed stats (like views, visitors, downloads, link clicks, leads collected, and more), check the Include detailed stats option. Now you can adjust the time period for your stats. By default, the report covers the last month. However, you can choose any time period you need.
- Options such as “Last 30 days” and "Last 12 months” represent the most recent 30 days and 12 months, calculated up to and including the current date (i.e., the date the report is requested).
- Options like “Last month” and “Last year” contain data for the whole previous calendar month or year, starting from the first day of the month/year.
- Options like "This month” and “This year" start from the first day of this period till today.
For example, if today is September 21, 2025, the date ranges would cover:
This month: Sep 01 - Sep 21, 2025
Last month: Aug 01 - 31, 2025
Last 30 days: Aug 22 - Sep 21, 2025
The available time periods for reports depend on your plan: with a Starter license, you can export up to 30 days back, with Optimal up to a year, and with Advanced or higher up to 2 years.
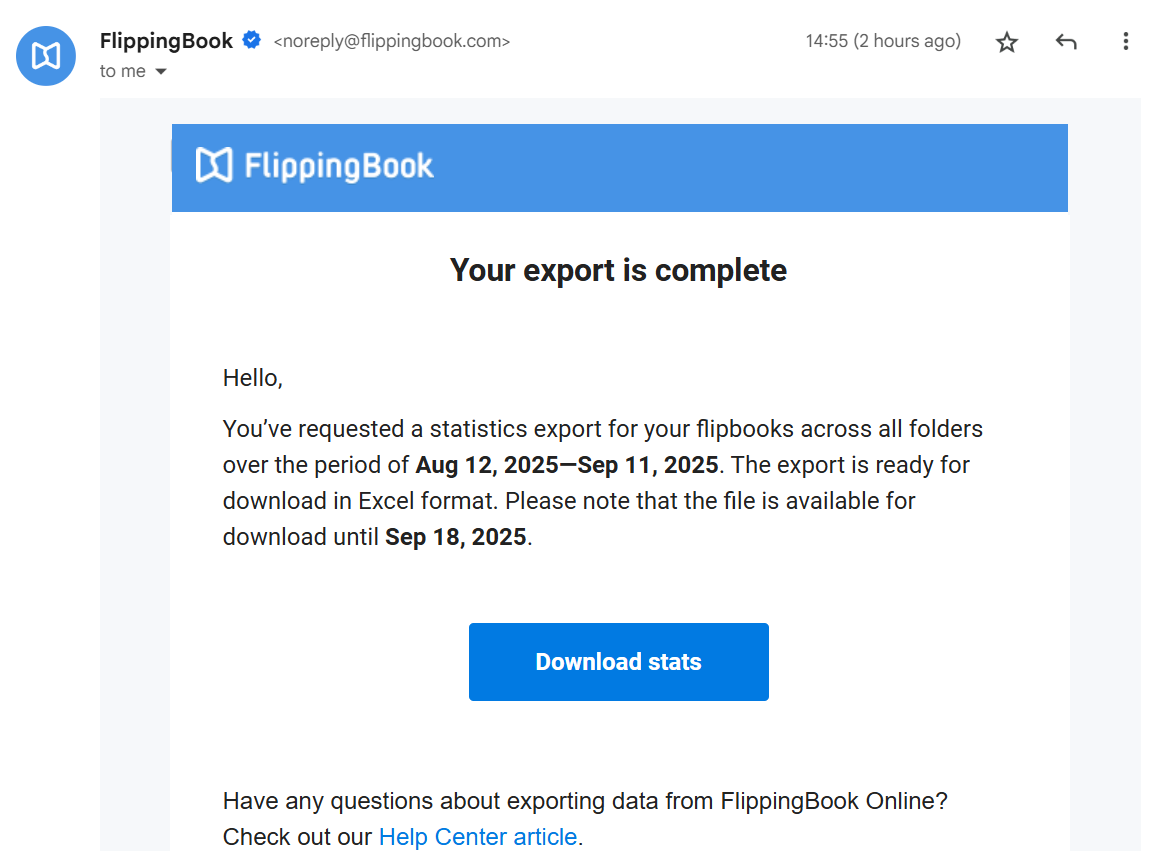
- Click the Export button. We will send an email to your login email address with a link where you can download the file. If you don't receive an email within 10 minutes, check your spam/unwanted email folder.
Note! If your login email address is outdated, update it in the profile page of your account. Click on the Change email link, enter your new email address twice, your password, and press Save.