Setting up SSO with Okta
This article contains instructions for connecting FlippingBook Online with Okta. It is intended for Okta administrators.
Initial setup
- Contact our support team and indicate if you want to use SSO to log in to the account or to restrict flipbook access.
- Await the confirmation message with details that you will need from the support team.
- Log in to Okta and go to the Administrator section.
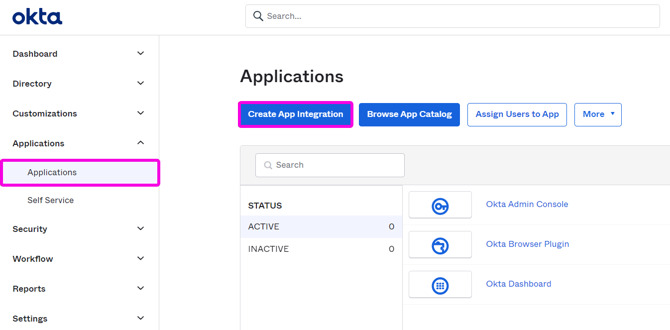
- Go to the Applications section, select Applications, and press Create App Integration.
- Select SAML 2.0 as the Sign-in method and press Next.
- Use FlippingBook Online or FlippingBook Readers as the App name and press Next. If you want to, you can right-click to download either of these logos:
 or
or 
- Fill out the SAML settings:
- Single sign-on URL: provided by the support team
- Audience URI (SP Entity ID): provided by the support team
- Name ID format: select the option EmailAddress
- Application username: select the option E-mail
- In the Feedback tab, select I’m an Okta customer adding an internal app and press Finish
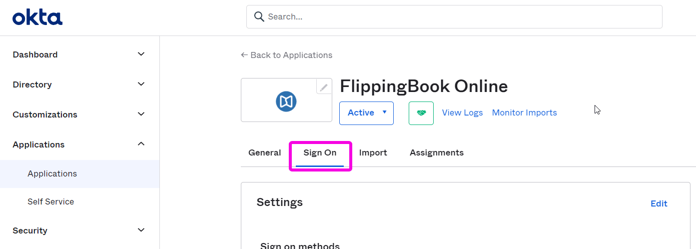
- You have created a new application. go to the Sign on tab
Scroll down to the SAML sign up section and press View SAML setup instructions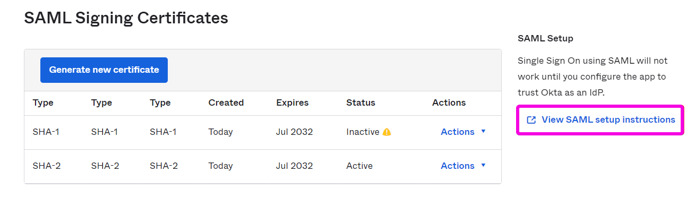
Then scroll down to the Optional section. You can stretch out the field in the bottom left corner.Click on the content in this field, press Ctrl+A to select everything, copy it, and paste it into your reply to our support team.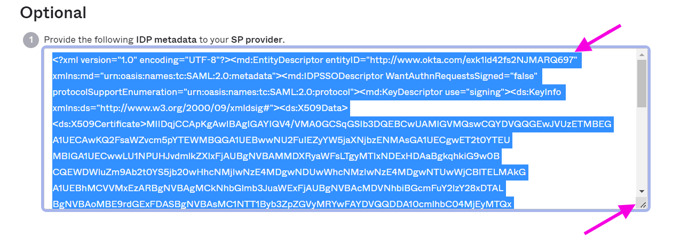
- Await the confirmation email from the support team that we have set up the integration on our end. This email will also contain additional instructions for your users on how to log in, and for you on how to add additional users in the future,
- After you receive our confirmation, add your users/groups to the newly created FlippingBook Online application as normal.
We also send a confirmation email to the account owner. This includes a link with your FlippingBook Online SAML domain encoded. You can distribute this link as a shortcut to your end-users. They will immediately enter their account (if already SSO-authenticated) or be taken to your SSO-authentication page otherwise.