What is FlippingBook Automation?
FlippingBook Automation is a complementary tool for FlippingBook Publisher that lets you process numerous PDF files automatically, in the background, without having to import and convert your files manually one by one in Publisher.
Visit our Automation overview page for a detailed functional overview, but in short:
- You set up a folder on your computer (or server) that is monitored by FlippingBook Automation.
- You copy/paste one or more PDFs into that folder.
- FlippingBook Automation converts the PDFs to flipbooks and saves them in another folder that you specified.
- You can then upload the output files in the same way as with the “[Upload to] Local Folder” feature in Publisher.
- You can continue dropping more PDFs into the folder. Your flipbooks will be ready a few minutes later.
It is not needed to launch Publisher in order to have it working. In fact, Publisher will only be needed in order to create a template - a .p2st file with the settings which will be applied to all PDF files that will be turned into flipbooks by FlippingBook Automation.
How does it work?
FlippingBook Automation consists of two main parts:
- a service that constantly runs in the background ;
- an interface that is used to manage the service.
Install the software and start the interface application, enter your credentials, and you will see the main interface of a tool. Here’s how it looks:
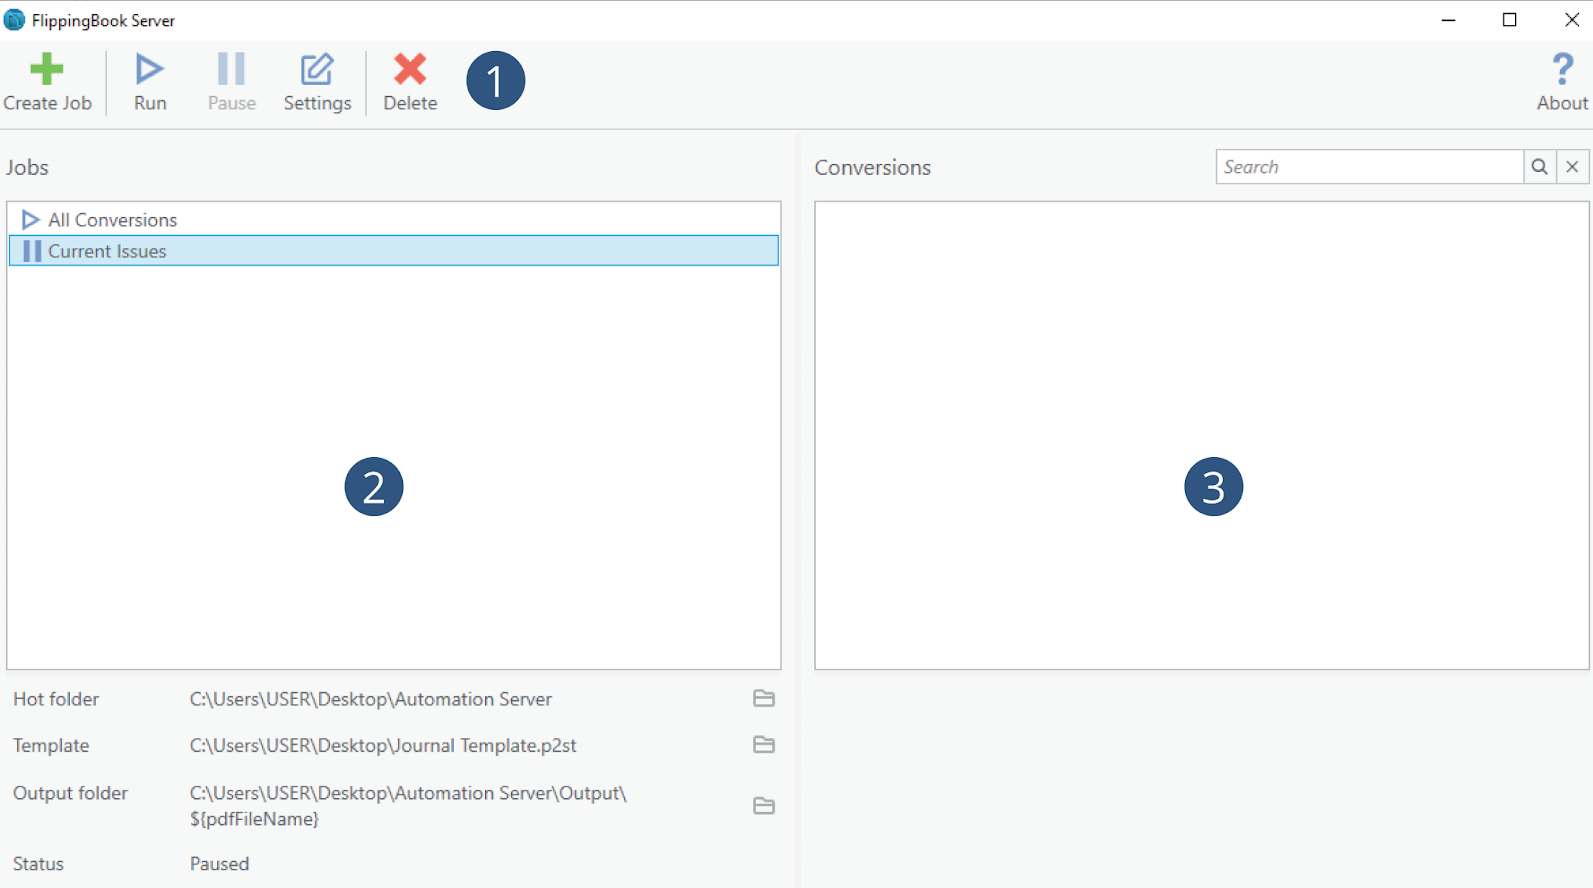
There are 3 parts to the interface:
- Menu panel - used to create jobs, modify them, and run/pause
- Jobs panel - an overview of your current jobs
- Conversions panel - an overview of all flipbooks that have been created.
How to get started?
You can start the automatic conversion by creating a Job. A job is basically a set of instructions that FlippingBook Automation performs on all files you put in the Hot Folder. If you click on a Create Job button on a Menu Panel, you will see a Create New Job window:
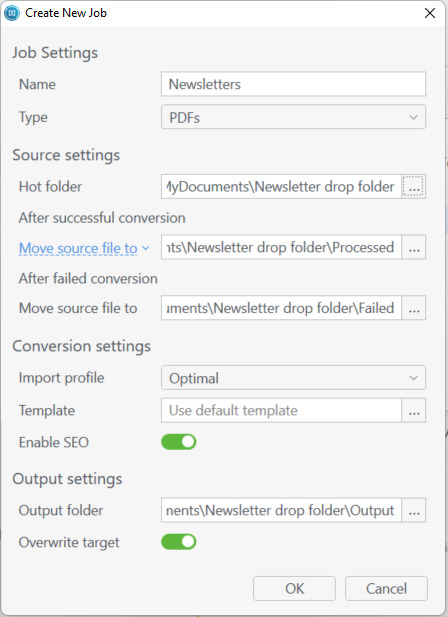
For your first job, all you need to do is to give it a name and select a hot folder. All the other settings will be assigned a default value. Now click Run in the menu panel, drop a PDF into the hot folder, and your flipbook will be created!
Job settings in detail
- Jobname. If all your flipbooks use exactly the same settings, you'll only need one job. But if you create several kinds of flipbooks with different settings (for example a monthly internal newsletter and a weekly sales brochure for customers), you can give them suitable names.
- Input file format: you normally select PDF files here, but if your license allows it, you can use XML-tickets. XML-tickets are used if you need individual settings for each PDF: what template to use, where to store the PDF file after the conversion etc.
Source settings
- Hot folder is the folder where you will drop the source files (PDFs or XML tickets) for conversion.
- After successful conversion: Here you can choose what to do with your source file after conversion has been completed successfully. You can either choose to move it to a folder of your choice, or delete the source file.
- After failed conversion: A folder for source files that for some reason fail to be converted.
Conversion settings
- Import format: we advise starting with the Optimal setting and skipping this for now.
But if you really want to know the technical details: Pages in your flipbooks consist of 2 different images: an image that only contains the text and is otherwise transparent. This is put on top of a substrate image that contains everything else (images, borders, shapes, etc). The text image is in SVG format. This means that it scales automatically without quality loss and looks great whether you look at it on a mobile device or a billboard. The substrate image is a JPG image.- Optimal: converts text separately as SVG image, and uses good quality JPG images for the substrates.
- Best Quality: converts text separately as SVG image, creates a higher quality JPG for the substrate. This results in substantially larger output files. In most cases, the added quality is hardly visible.
- Small file size: converts text separately as SVG image, creates a lower quality JPG for the substrate. This results in smaller output files, but some quality loss can be visible, especially if zoomed in.
- Fast conversion: does not create a separate SVG image for text and creates a lower quality JPG for the substrate. This results in small output files, but considerably lower quality, and text may become blurry.
- Enable SEO: specify whether the flipbooks should be indexable by search engines.
- The template file with the settings for the flipbook (background, logo, CTA button, etc). You can generate a template file in FlippingBook Publisher with your preferred settings.
Output settings
- Specify the output folder where your flipbook files will be saved in. In this folder, we create a subfolder for each PDF you convert with the name of the PDF as the folder name.
- Whether to overwrite the target output folder if you upload a PDF with the same name twice.
You can modify these settings for the job that is already running with the Settings button.
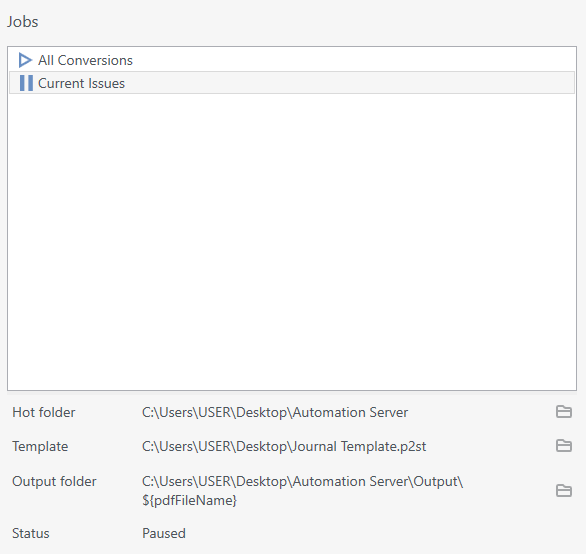
After creating and running a job with a Run button, you can see its settings on the Job panel on the left.
Creating actual publications
Once the job is running, all you have to do is put your PDFs in the "Hot folder". FlippingBook Automation picks them up, and you can see the progress of the tasks being performed on the Conversions panel on the right. You will also see the history of completed conversions:
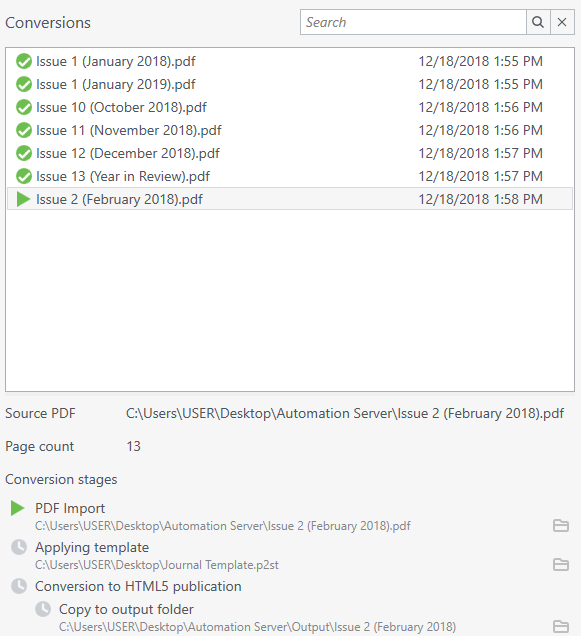
Each conversion has three stages (PDF Import, Conversion to HTML5 publication files, and Finalization). Click on any entry to see the status of each step. You can also open each of the folders you’ve appointed in the job settings to see the actual files. The most important one is the 'Output folder', which contains your actual flipbook.
Note! You don't have to use the interface application to create flipbooks. Once the job is set up and running, you can simply drop flipbooks into the hot folder and check the output folder a bit later to collect your output! FlippingBook Automation is typically installed on a server. Anyone with access to the hot folder on the server can drop files into it.
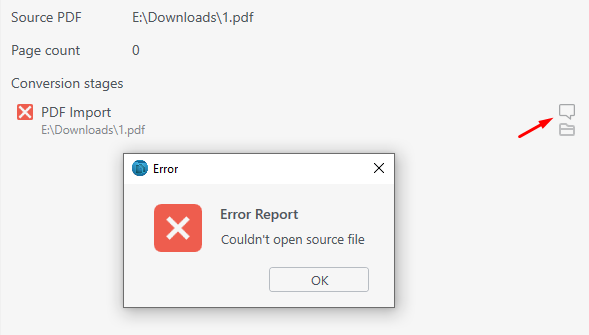
In the rare case that an issue occurs during any of the stages of the conversion, it is also possible to click on the callout icon to bring up the error message for the troubleshooting purposes:
What's next?
After the conversion is completed, the publication files are stored in the output folder ready to be uploaded. You can upload them the same way as when you use the Upload to your server option in FlippingBook Publisher.
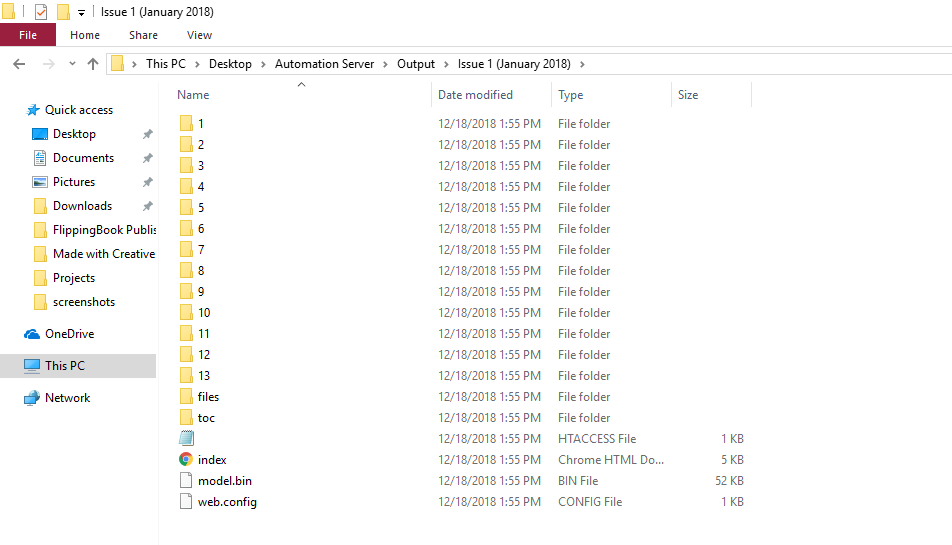
Please note that opening the index.html files directly in your browser to 'preview' it will NOT work. It will only show the preloader but not the actual flipbook. Due to security restrictions, most browsers block the scripts that we use when opening files on your local computer. If you want to preview the results, click on the globe icon in the Automation interface after the Copy to output folder. 
This will start a lightweight local web server instead of opening the files directly and you will see a working preview of the flipbook you just created.
Checking your usage
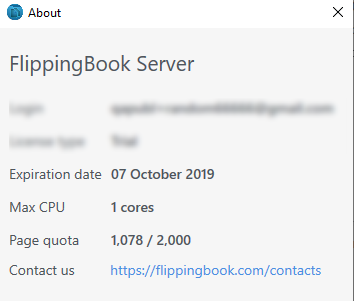
If your FlippingBook Automation license edition has a page limit (per year) limit, you can see how many pages you have already converted (as well as the general status of your license) in the About menu:
Frequently asked questions
Can I trial FlippingBook Automation?
Yes, that's possible. Please leave your contact details to get the demo version. We will be in touch with you shortly to get you started.
What is the price for FlippingBook Automation? Can I talk with someone about purchasing Automation?
Yes, that's highly recommended. There are different possibilities for the number of pages, the number of hot folders, and whether or not you'd like to use XML tickets. We will be happy to discuss your individual requirements with you. Please fill out the contacts form and our Sales team will be in touch soon to discuss possibilities and pricing.
What are the technical requirements for FlippingBook Automation?
FlippingBook Automation is Windows-only software. You can see the exact specifications here.
How many pages can I convert?
The main limitation is of course dependent on your license. Other than that, how many pages you can convert depends on your hardware and the complexity of the PDFs you convert. If you need to create a lot of pages in a short time, the table below gives an indication of speeds that should be feasible in pretty much all circumstances.
| Content-type | Average pages/hour | Average pages/day | Average pages/month | Average pages/year |
| Plain | 4000 | 96 K | 2,8 M | 34 M |
| Enriched | 3000 | 72 K | 2,2 M | 26 M |
| Complex | 2000 | 48 K | 1,4 M | 17 M |
- Plain content is for example textbooks, where the majority of your pages consist of just text with some formatting like headers, paragraphs, occasional illustrations, and footers.
- Enriched content is for example newsletters: your pages contain a mix of text and images enriched by textboxes, shapes, graphs, dividers, etc.
- Complex documents are for example brochures and catalogs: your pages contain lots of individual elements: several images per page, tables, callouts in different fonts, etc.