Embedding flipbooks in email
One of the most convenient ways to share your publication is to do it by email. But how do you make sure that your emails don't go unnoticed? You could use a plain link to your flipbook, but that looks a bit bland. Why not a clickable image of your flipbook instead? or even an animation of your publication with a page turned over? It will not take much time to add it but will attract attention to your email and publication for sure.
Here is what your email message can look like with an embedded GIF animation of a flipbook in it:
This article explains how to add a flipbook's animated preview to a message in Gmail, Mailchimp, and Outlook. If you feel like you might need our help with this, our Customer Success team is ready to go with you through the whole process. Book a meeting here.
Here are the general steps to embed your flipbook in your email message:
- Record a GIF of your flipbook with something like Chrome Capture - screenshot & gif tool. Learn how to create a perfect GIF of your flipbook.
- Paste this GIF into a message.
- Link the GIF to your flipbook link.
Embedding flipbooks in Gmail
- Open your Gmail account and click on Compose on the left-hand side of the page.
- Once your Gmail message window is opened, click the Insert photo button:

- Choose the GIF file of your flipbook and paste it into your email message.
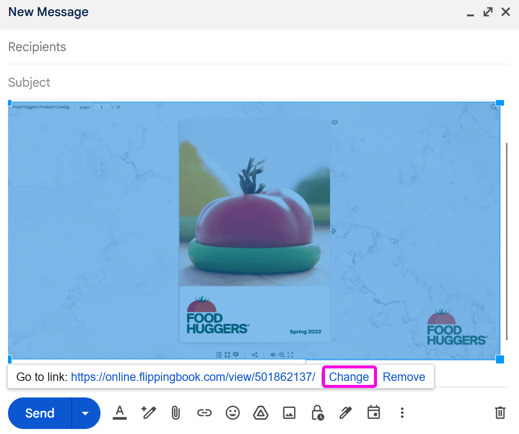
- Then select the GIF. You can do this by double-clicking it. When the GIF is blue, this means it has been selected:
- Click the link icon at the bottom of the Compose window. A small window will appear under the GIF, showing you the option to change or remove the link. Choose the option Change:
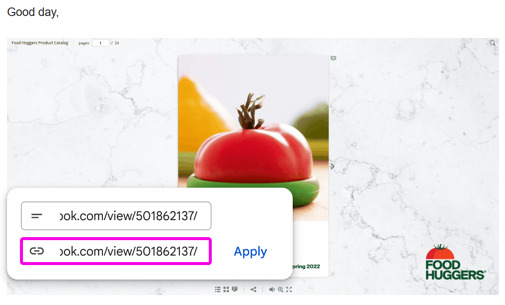
- Enter the web address of your publication and click Apply:
- After that, write any text you want and finish your email as usual.
Embedding flipbooks in Mailchimp
You can also add an animation of your flipbook in the Image block of your email template via Mailchimp. To do this, follow these steps:
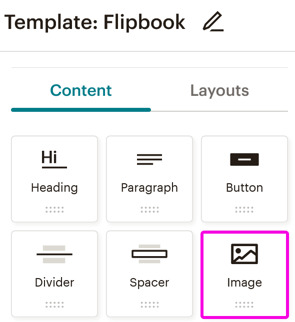
- Start creating your template as you usually do, and click and drag the Image block into your layout:
-
Drag the GIF file from your computer onto the block to add the animation there.
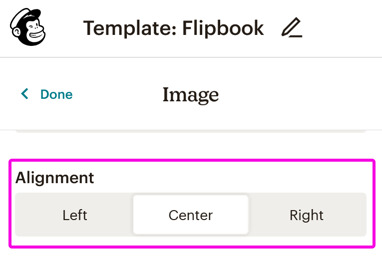
- In the settings of the Image block, find the Alignment settings to adjust the GIF's position in the email message:
- Scroll below the Alignment settings to the Link To option and paste the link to your flipbook in the field shown on the screenshot:
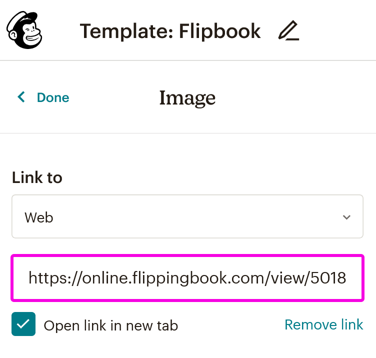
- If you want the flipbook to open in a new window, tick a checkbox Open link in new tab.
- Then you can switch to the Paragraph block. Write any text you want (you can even include the link to your publication again).
- When you’re done, click on the Save Template and Exit button in the upper right corner of the screen.
Embedding flipbooks in Outlook
If you want to embed your flipbook into your message in Outlook, follow the steps below:
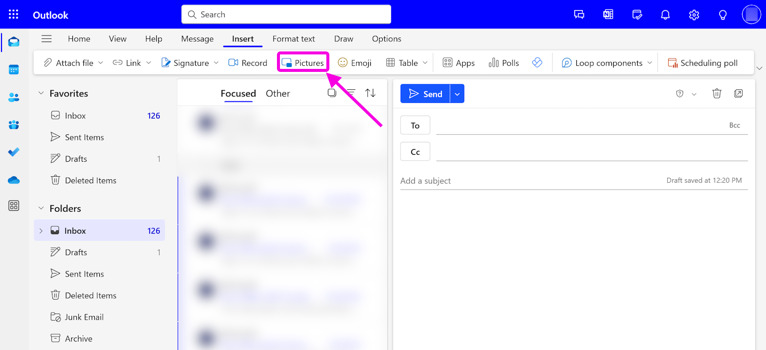
- Start composing your email by clicking on the button New mail on the left-hand side of your Outlook page.
- Find the option Insert -> Pictures to add your GIF file:
- Click on the inserted GIF and resize it the way you want by dragging it. Then put the cursor next to it and drag left to select it so that it would turn blue.
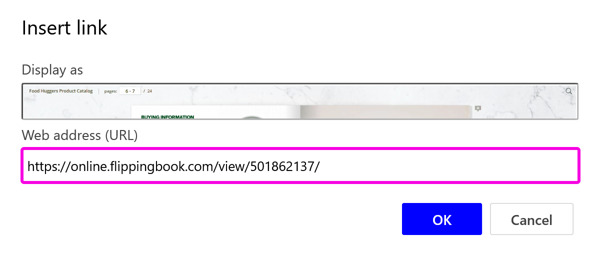
- To add a hyperlink, click the link icon, add the link to your flipbook in the Insert link window and press OK:
- After that, write any text you want to attract your customers using the Outlook message box and send your message by choosing the button Send.
Learn more…
- How to create an animation of your flipbook?
- How do I know if someone opened my flipbook from an email?
- Optimizing GIFs for the best user experience.