Customizing your bookshelf
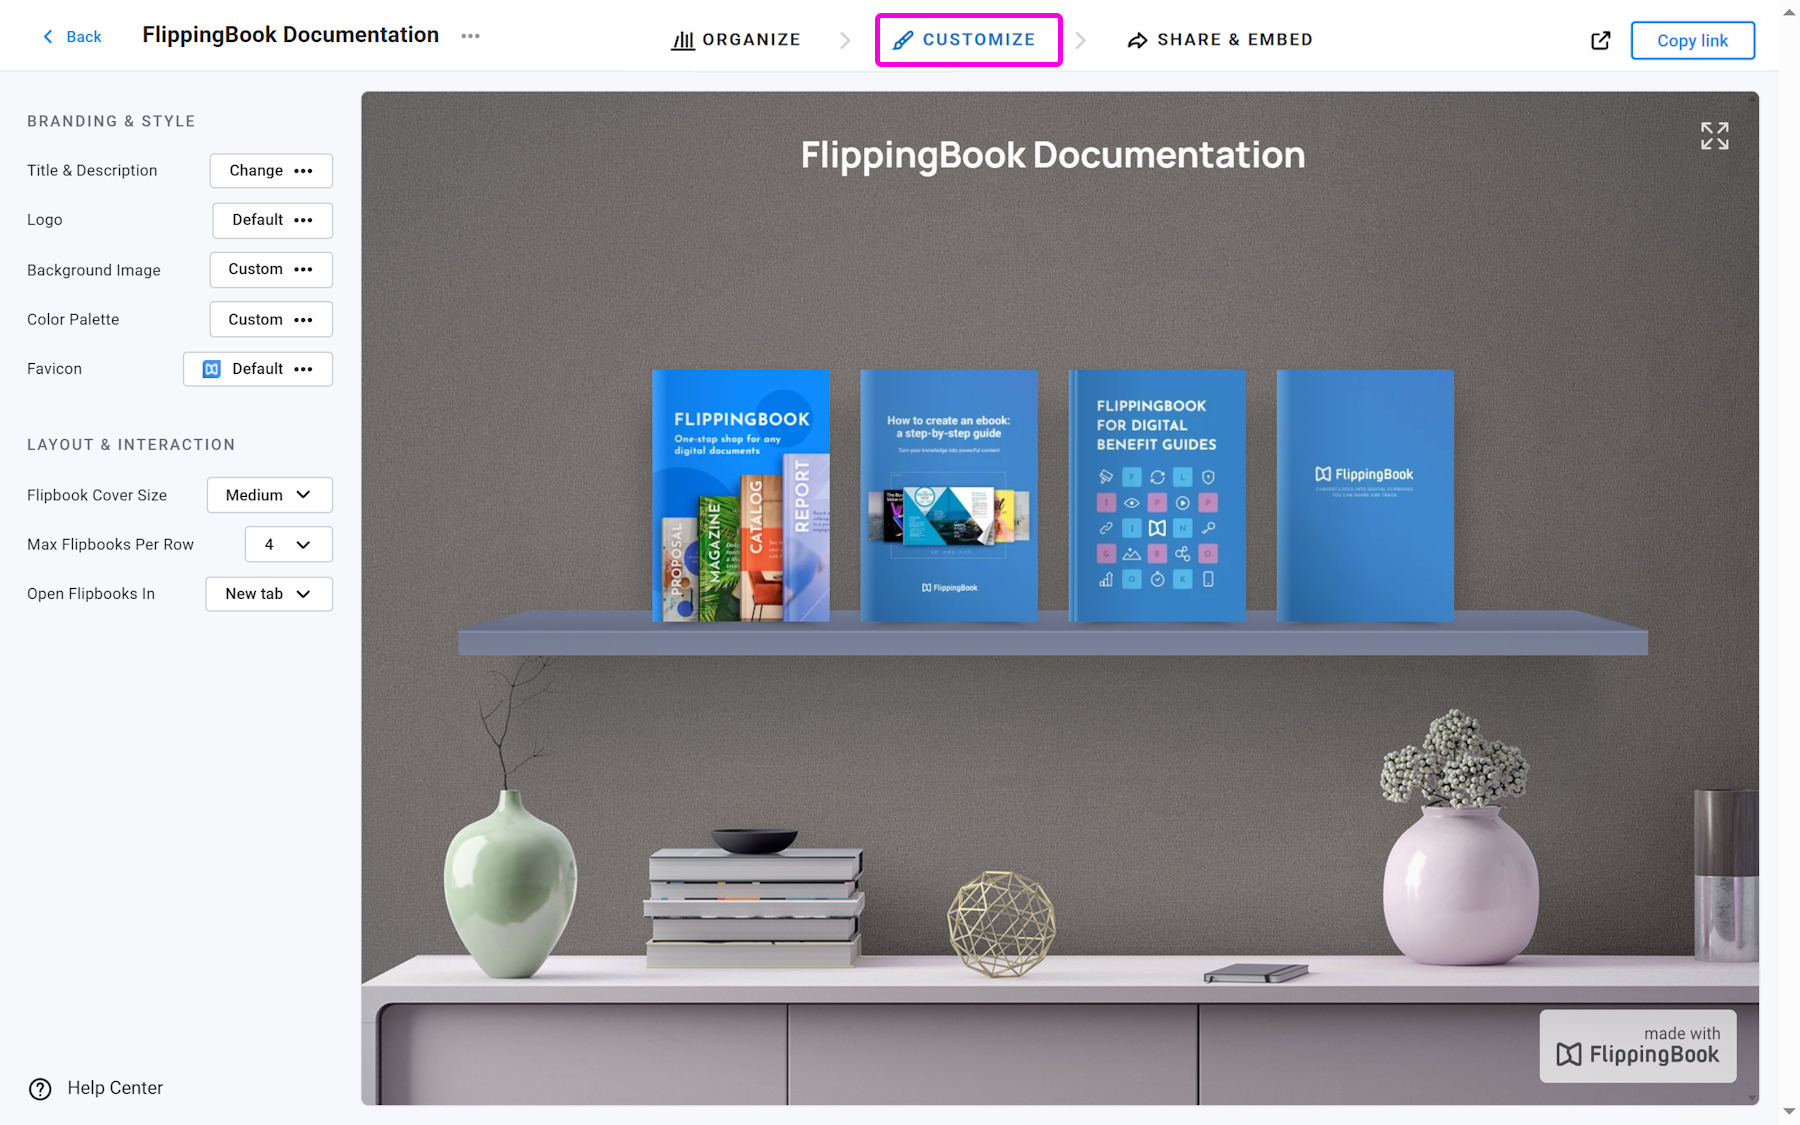
The Customize section allows you to modify the bookshelf according to your branding guidelines, content, and preferences. To access this section, open your FlippingBook account, click Bookshelves in the top menu bar, and select your bookshelf. You’ll find the Customize section at the top of the page.
Note! Bookshelves are available on the Optimal plan and higher.
In this article, you’ll learn how to customize the appearance and style of your bookshelf. We’ll cover how to update your logo, background image, favicon, and more, as well as guide you through the steps to adjust its layout and interactions for the best experience.
Branding & Style
Layout & Interaction
Branding & Style
Once you open the Customize page, you see the Branding & Style section on the left side of the page. Below, we explain what options you can customize here.
Title & Description
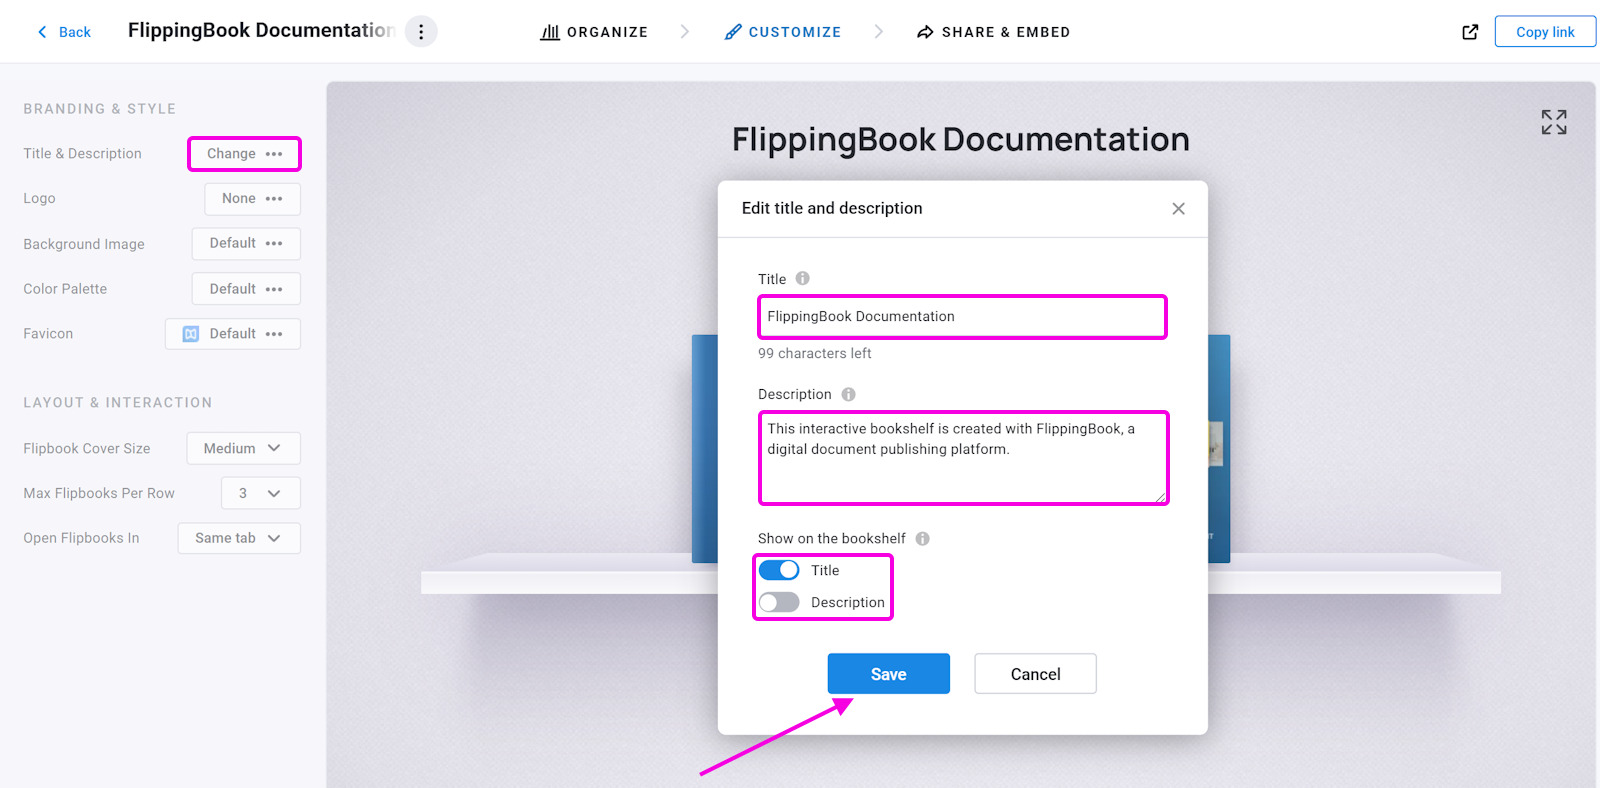
Title & description allows you to name your bookshelf and describe it to reflect the content of your bookshelf. We advise you to choose a clear and suitable name for your bookshelf, even if you choose not to show it on the bookshelf itself. Viewers will see the title and description on top of the bookshelf, and when you share its link on social media or messaging apps.
To change it, click Change next to Title & description and write any title and description you want. Optionally, you can show or hide your title and description as we show on the screenshot. When done, press Save.
Logo
Logo lets you change the FlippingBook logo to your own or delete it if required.
To change it, click Default next to Logo and you’ll see a pop-up window. Here you can click Browse image to upload a new logo, or hover over the current logo, click three dots, and choose Remove image.
![]()
If you upload your own logo, you can enter your website’s link in the Web Address (URL) field. When visitors click your logo, the link will open in a new browser tab.
You can also set the Background Color for the logo — choose from light (chosen by default), dark, or transparent.
If your logo itself is transparent, we advise using either a light or dark background. The logo often overlaps with the shelves or cover previews. Without any background at all, that looks unprofessional if the logo interferes with other elements. Even if on your own screen this doesn't happen, your visitors may use screens with other resolutions. If your logo already has a solid background, making the logo background transparent is more logical, though you may still prefer the badge-style outline to offset it more clearly against the shelves and covers.
Use the Show logo on mobile devices option to decide whether the logo should be visible when readers view your flipbook on mobile.
Background Image
With the Background Image option, you can customize the background of your bookshelf to match your brand and taste.
To change or remove the Background Image, follow the steps below:
- In the Branding & Style section, click on the button next to Background Image.
- Click on the Browse Image button to upload an image from your device.
- Once your image has been uploaded, you can adjust your image as follows:
Image Fit
Fill: resizes the image to fill the full screen. Some edges of the image may fall outside the visible area.
Fit: resizes the image to fit on the screen entirely. The remaining space shows the background color from the color palette.
Tile: keeps the image in its original size, using tiles to cover the screen.
Image Position anchors your image at a specific position behind the bookshelf. This can be useful if your background has a unique design element that you don’t want to cover. In the example below, the "Happy holidays" text is partly cut off when it’s centered, but fits well if you choose Bottom Right: - Press OK to save the changes.
Color Palette
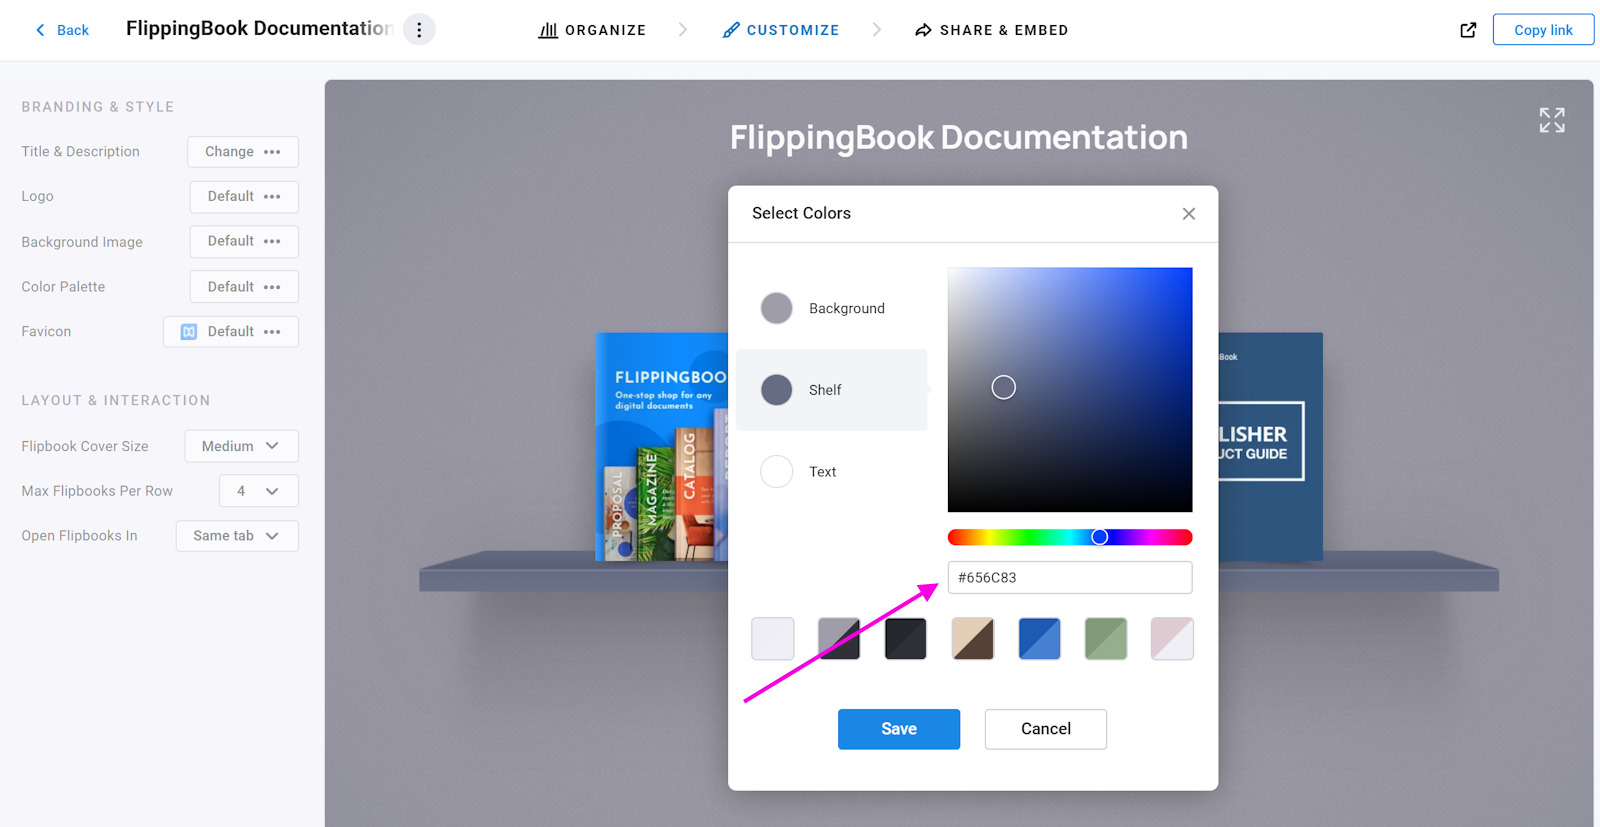
The Color Palette feature allows you to fine-tune the appearance of your bookshelf. You can select the color for:
- Background - the background of the book (if no image is used).
- Shelf - the color for your shelf. You can choose any color that matches your brand and preferences.
- Text - any text you use as the title and description, flipbook titles on hover, and navigation buttons.
In the Select Colors window, you can pick a color from the spectrum and then click on the gradient with the saturation and brightness of your choice, or enter a color code directly into the color value text box. You can use a hexadecimal code (for example, #00FF00). If you’re unsure of your brand’s color code, you can ask your designer for the correct value.
Favicon
A Favicon is visible in the browser tab, but can also be found in bookmarks, browser history, and search engine results pages.
Follow these steps to change or remove the favicon:
- Inside the Branding section, click on the button next to Favicon.
- Once the Edit Favicon window appears, choose Browse Image to upload a favicon from your device. We recommend using transparent ICO or PNG images of up to 200 KB.
- If you don't have a suitable favicon, you can also copy the URL of a web page that uses your favicon of choice, paste it into the textbox, and click Confirm. We try to fetch the icon and use it for your bookshelf.
- Don’t forget to click OK to save the changes.
Layout & Interaction
This section includes the following options you can use:
Flipbook Cover Size - the size of the flipbook covers on display to match your desired look. It can be Small, Medium, or Large.
Max Flipbooks Per Row - the maximum number of flipbooks on a row. With this option, you can neatly organize some bookshelves. E.g., if you have 8 brochures, you can limit the max to 4. This way, you get a neat 4x2 layout. Note that depending on the flipbook cover size, format, and viewer screen size, the actual number on display might be lower. The variants you can choose are Auto (chosen by default) and from 2 to 7.
If you choose the Auto option, the number of flipbooks shown on each shelf will automatically adjust to fit the window's width.
Note that if the available space drops below 1180 pixels in width, we remove the edges from the bookshelf. This way, we can keep showing as many of your books as needed on a single shelf, even on smaller screens.
Open Flipbooks In - specifies how your flipbooks open when readers click on them: in a New tab or the Same tab.
- New tab: Ideal for browsing multiple flipbooks while keeping your bookshelf easily accessible.
- Same tab: Best for directing readers straight to one flipbook, allowing them to stay focused on its content.
Note!The 'Same tab' option doesn’t apply to embedded flipbooks. These will always open in a new tab.
Related articles:
- Curious how to set up a bookshelf, add flipbooks to it, or reorder them? Head over to our Create a bookshelf article.
- If you’d like to share your bookshelf or embed it on your website, visit our Sharing and embedding your bookshelf guide for step-by-step instructions.