How to create a bookshelf? 🆕
In FlippingBook Online Optimal and higher, you can create bookshelves and customize them to match your brand and taste. Bookshelves are a great way to present related books - with a common subject, from a certain period, or for a specific audience. You can arrange your flipbooks in a logical reading order for your audience, they can find titles easily, and share or discover new reads - all in one convenient, compact, well-organized place. Every bookshelf can contain up to 100 flipbooks, and you can create 100 different bookshelves!
In this article, we'll show you how to:
- Create a bookshelf
- Add flipbooks to your bookshelf
- Remove a flipbook from your bookshelf
- Reorder flipbooks within your bookshelf
- Add flipbooks to your existing bookshelf
- Manage your bookshelf
Creating a bookshelf
To create a bookshelf, follow these steps:
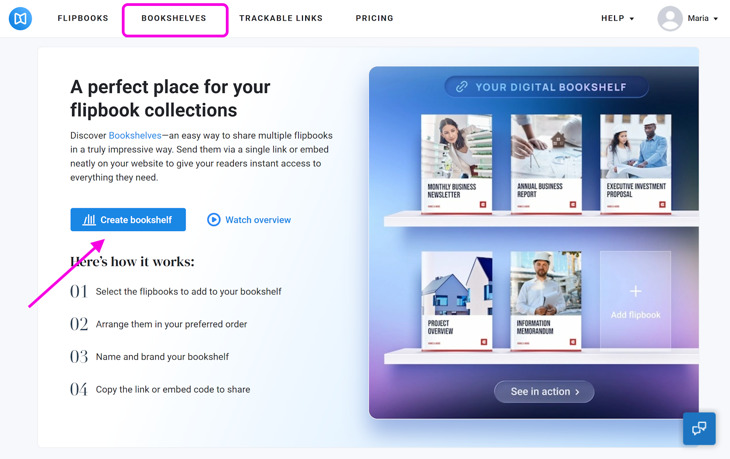
- Open your account and click the Bookshelves option at the top.
- On the Bookshelves page, press the Create bookshelf button.
To give your bookshelf a suitable title, click the three dots next to the Bookshelf title at the top left corner of the page, choose Rename, enter the title you want in the title field, and press Save.

If you want to display the title and description on your bookshelf, enable them here as well.
So you have created a new bookshelf and renamed it. Now it’s time to add flipbooks to this bookshelf.
Add flipbooks to your new bookshelf
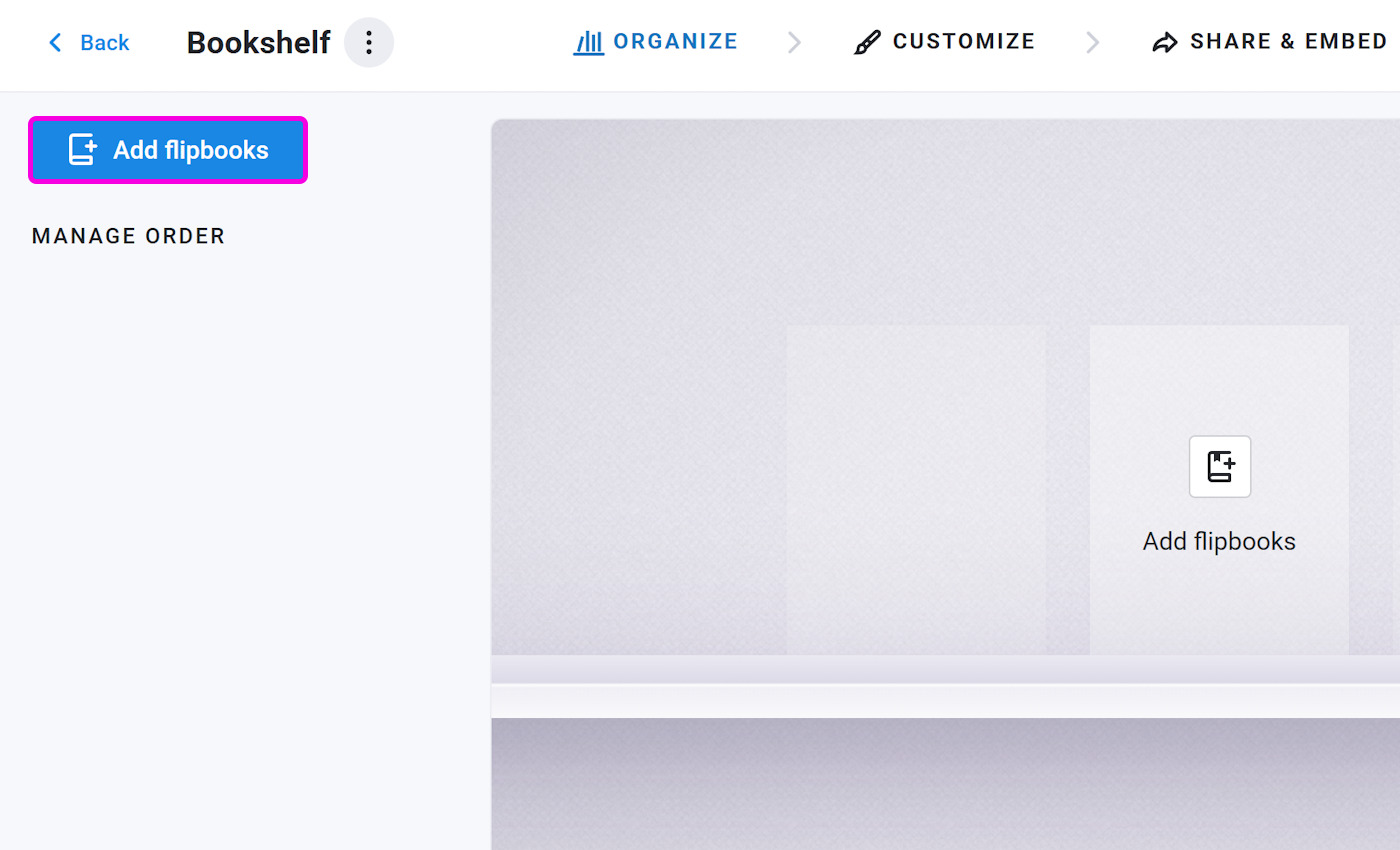
Once you’ve created a bookshelf, you can add flipbooks by pressing the Add flipbooks button on the left side of the page or in the empty thumbnail in the shelf itself:
This opens a window with previews of all your flipbooks. You’ll see all your folders on the left-hand side and all the publications in that folder in the main panel. Click any flipbook thumbnail to add it to your bookshelf. You can add as many as you want, up to a maximum of one hundred.
To select multiple flipbooks at once, hold down the Shift key and click the first and last flipbook in the range. We highlight all publications you select this way and add a checkmark. To remove a flipbook from your selection, click it again to deselect.
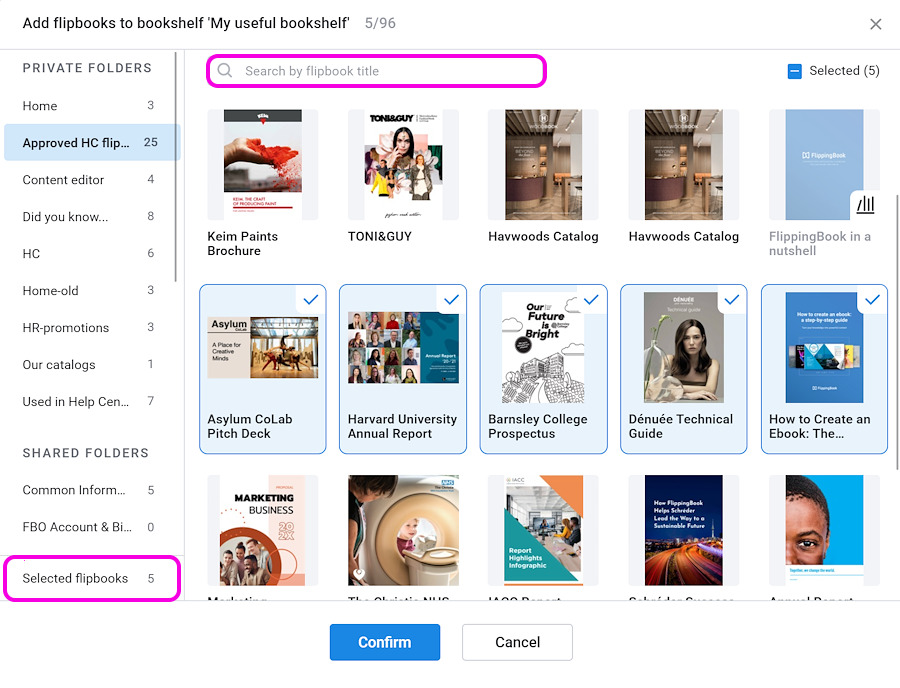
All selected flipbooks are stored in the Selected flipbooks folder at the bottom of the left-hand panel. You can browse through different folders and add more books to your selection without losing your current selection. When done, you can click on the Selected flipbooks folder to review your selection and, if required, remove some books.
Tip! If you know the flipbook’s title, there is no need to browse through folders. Simply type a part of the title in the search field near the top of the window.
Once all your flipbooks are added to the bookshelf, click Confirm. They will then appear on the bookshelf and in the list on the right side of the page. You can now use the ![]() -icon in the top right corner to see how your bookshelf looks to your audience and use the Copy link button to copy the URL so you can share it. Check our Sharing and embedding your bookshelf article for more details and different ways to share!
-icon in the top right corner to see how your bookshelf looks to your audience and use the Copy link button to copy the URL so you can share it. Check our Sharing and embedding your bookshelf article for more details and different ways to share!
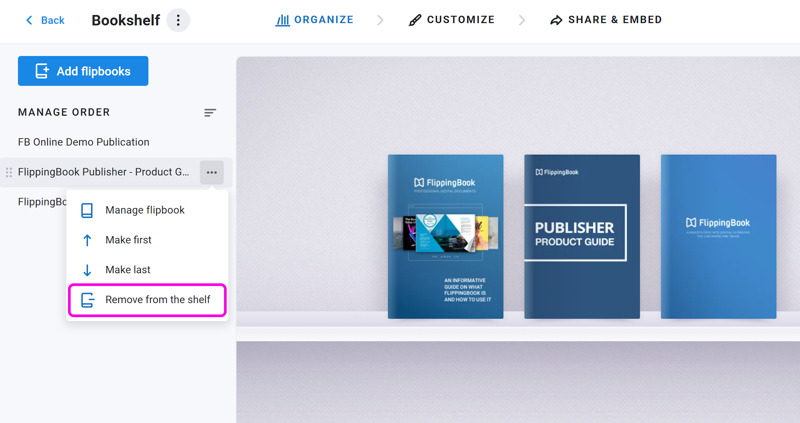
Remove a flipbook from your bookshelf
To remove flipbooks from your bookshelf:
- Go to the bookshelves section in the top menu bar, and select your bookshelf.
- On the left side of the page, find the title of the flipbook you want to delete, and hover over it.
- Press the three dots, select Remove from the shelf.
Reorder flipbooks within your bookshelf
If you have a bookshelf and would like to rearrange the flipbooks in it, follow these steps:
- Go to the bookshelves section in the top menu bar and select your bookshelf.
- On the left side of the page, find the title of the flipbook you want to move and hover over it.
- Click it, hold the mouse button, drag it to your desired position, and release the mouse button.
- The flipbooks on your bookshelf will adjust automatically. You can also click on the three dots next to the title and choose Make first or Make last. This is more convenient for bookshelves with dozens of books.
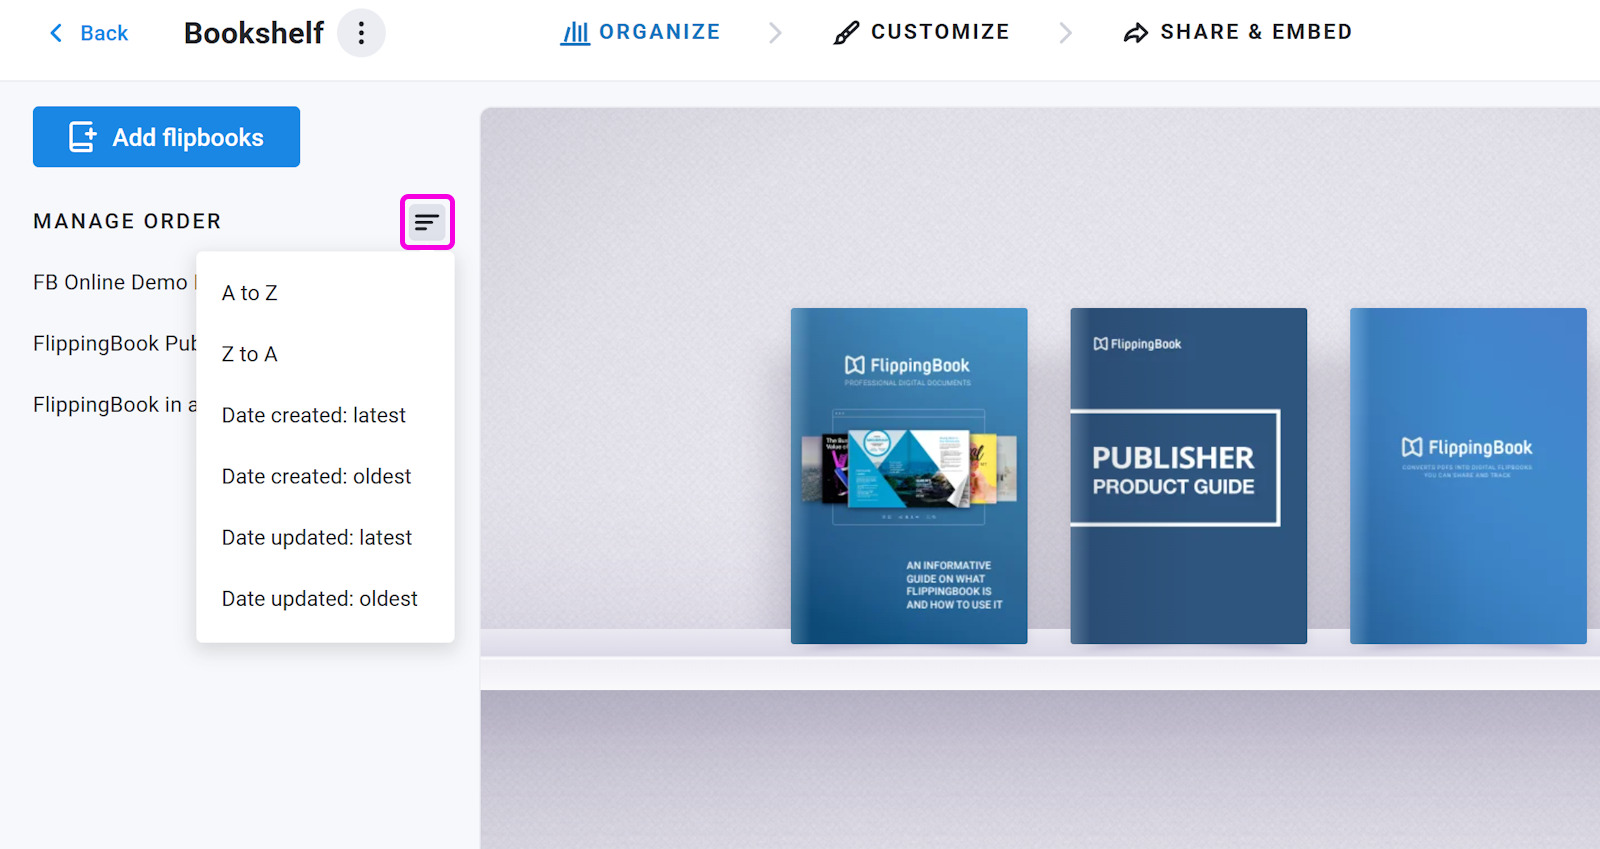
Tip! You can organize your flipbooks alphabetically or by date (created or updated) by clicking the sorting icon next to Manage order on the left side of the page. Note that this will override any manual changes you made!
Add flipbooks to your existing bookshelf
If you just created one or more new flipbooks and want to add them to an existing bookshelf, you can go to the Bookshelves section, click on your shelf, and add more books. But there is a faster way, straight from the main account page.
- In your list of flipbooks, check the books you’d like to add to your bookshelf.
- Click Add to bookshelf at the top of the flipbooks’ list.
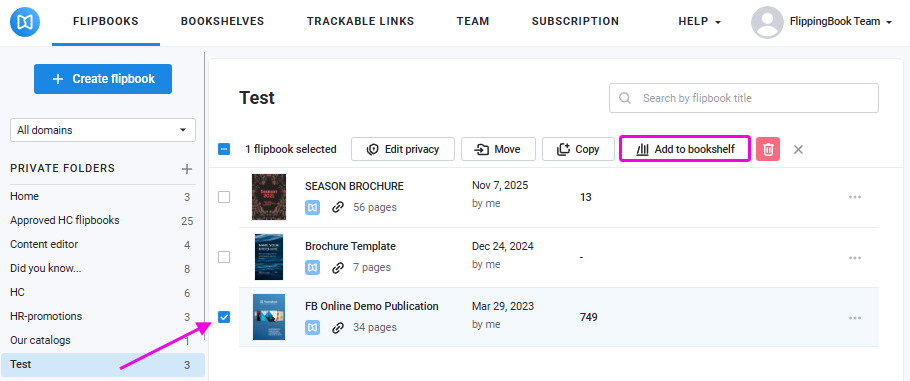
- Select the bookshelf you want to use.
- Press Confirm.
You’ve added new flipbooks to your bookshelf.
Manage your bookshelf
After creating a bookshelf, you can easily manage it. Go to the bookshelves section in the top menu bar, and click the three dots directly under the thubnail of the bookshelf you want to manage:
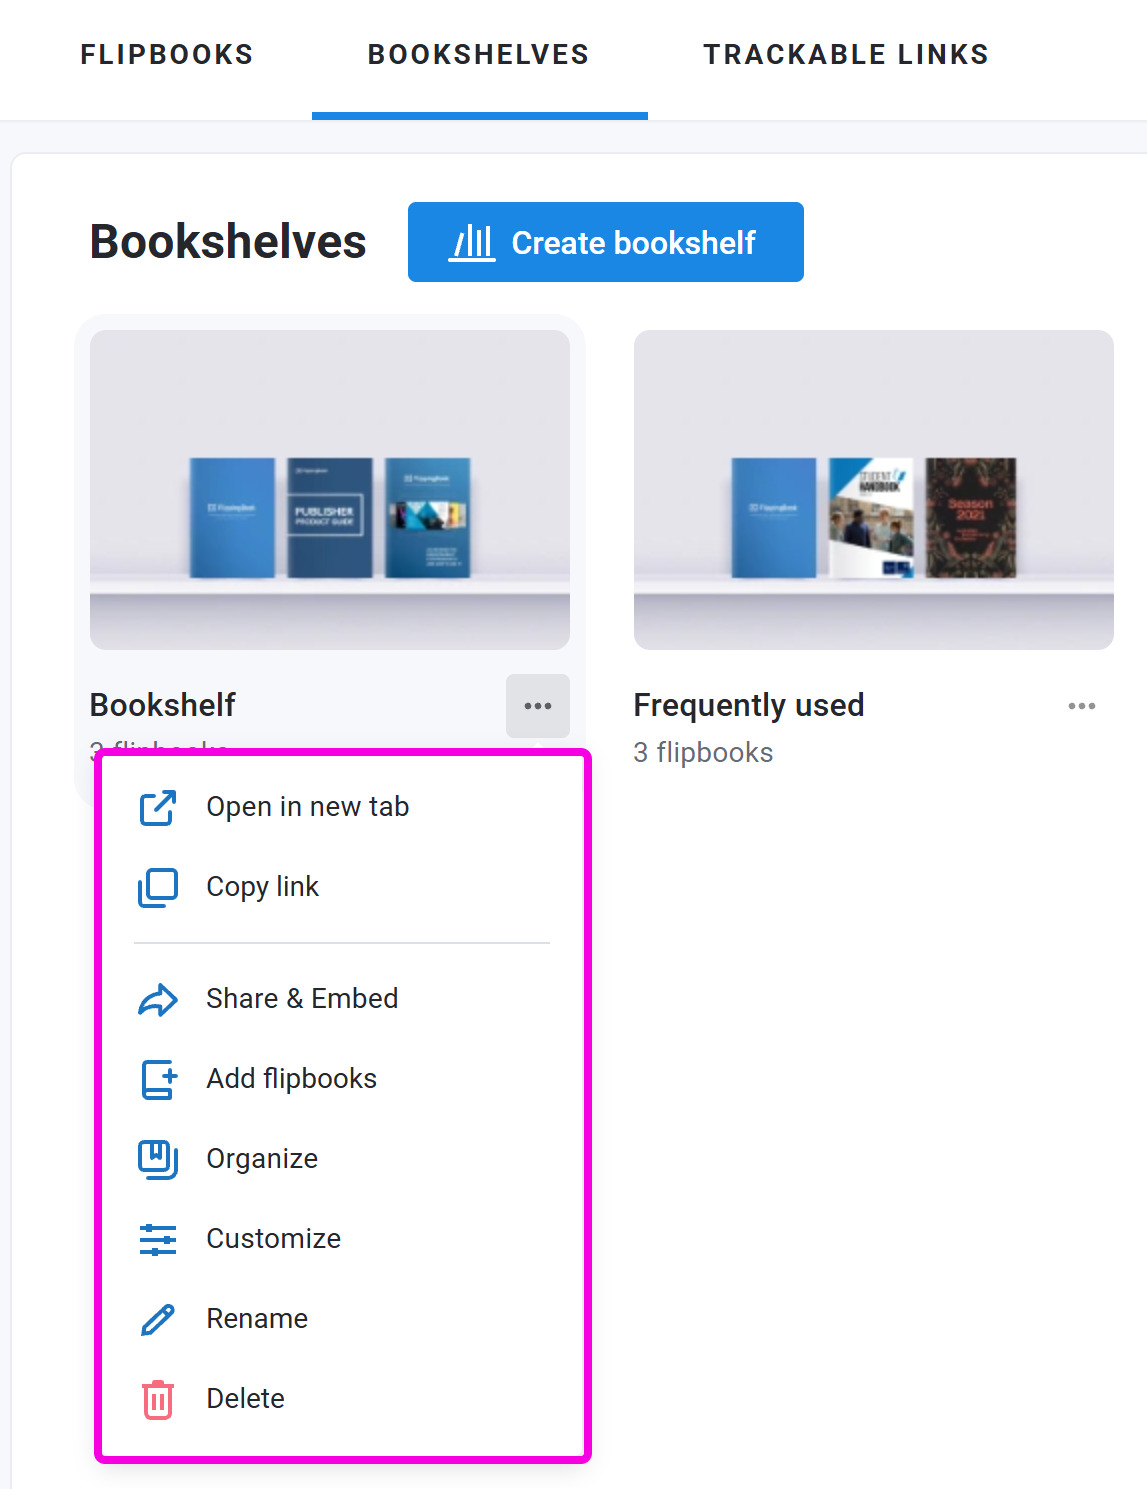
You’ll see the following options:
- Open in a new tab – Opens the bookshelf in your browser so you can see how it appears to readers.
- Copy link – Copies the link of your bookshelf so you can open it directly or share it.
- Share & Embed – Opens the Share & Embed page so that you can use these options. Check our Sharing and embedding your bookshelf article for more details.
- Add flipbooks – Opens a window where you can add any flipbook from your account.
- Organize – Takes you to your bookshelf page where you can reorder or delete flipbooks.
- Customize – Lets you style the bookshelf to match your brand and taste.
- Rename – Allows you to rename your bookshelf.
- Delete - Deletes the bookshelf only. Your flipbooks will not be affected.
Related articles
- Want your bookshelf to reflect your brand and personal style? Check out our Customizing your bookshelf article to learn how.
- If you’d like to share your bookshelf or embed it on your website, visit our Sharing and embedding your bookshelf guide for step-by-step instructions.