So, you’ve signed up to FlippingBook Online and are about to create your first flipbook that will change the way you work with documents forever. Congrats!
We’ve designed FlippingBook Online to be intuitive and super easy, so creating an online flipbook won’t take up much time. All you need to do is to follow a few simple steps.
#1 Upload Your PDF File to FlippingBook Online
The software will automatically convert it into a flipbook in about 2–5 minutes, depending on the size of the file. You can have a cup of coffee meanwhile—but a really small one.
💡 Don't have a ready PDF on hand?
Don’t worry—you’ll be able to start with a demo PDF we provide.
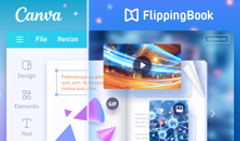
What's more, you can create your PDF in Canva from scratch and publish it to FlippingBook right from your Canva account. To give you inspiration, we’ve designed 20+ stunning Canva templates: catalog, magazine, brochure, newsletter, flipbook, presentation, proposal, and report. Add any template to your Canva account and customize it to your liking. And then publish to FlippingBook straight away.
#2 Customize and Brand
Once your flipbook is converted, you’ll be introduced to the Customize section of your account. That’s where the fun starts! Let’s look at the key settings of the section:
- In Skin you’ll find a gallery of 50+ ready designs to match your flipbook's look.
- In Branding you can add your logo, favicon, custom color palette, and a background image to reflect your company's style.
- Controls is where you can tweak the buttons appearing in the interface of your flipbook. This way you can control how people interact with your content. For example, you can make a Table of Contents or Thumbnails visible by default to make navigation around your flipbook easier.
#3 Choose a Privacy Level
We care about your content security on the web a lot. There are 6 options you can choose from depending on how sensitive your document is and what your goals are.
- Public (Not available in Trial). This mode opens your content to search engines, which means it will appear in search results on Google, Bing, etc. With FlippingBook, your documents get an SEO boost, too, so you can expect them to be ranked pretty high.
- Shareable link. It’s the default mode which makes your content available via direct link to anyone who you share it with. It does NOT make it searchable on the internet.
- Password. The name speaks for itself: set up password protection to give your content an extra layer of security when sending someone a direct link or embedding the document into your website.
- Restricted access (Not available in Trial). This is our tightest privacy mode for Enterprise plan users, best suited for businesses that need to share sensitive corporate documents with select employees. If you use an identity provider, you can connect it with FlippingBook, list your authorized readers, and require them to log in via SSO to access content.
- Protected embed. This means your flipbook will only work within the websites you choose. Even if someone manages to copy the link, the document won’t open anywhere outside of your domain. It’s a great option for sharing internal documents—reports, guides, and handbooks—with your colleagues.
- Private. The flipbook will only be visible to you within your FlippingBook account. This can be handy when you are still working on a draft and aren’t ready to share your document with the world yet.
#4 Add Interactivity
Once you’re happy with your flipbook’s look and privacy settings, it’s time to spice it up with some interactive elements. To do that, click on the Add videos, links, etc. in the Customize section.
And welcome to the Editor! Here’s what you can add with its help:
- Video. FlippingBook supports YouTube, YouTube Shorts, Vimeo, and Wistia links. Just copy and paste your link, and place the video box on the page. The videos can play inline or in a pop-up—whichever you prefer. Plus, you can upload MP4 videos via a link or directly.
- Link. You can add both external links to extra resources and internal links between the pages to make navigation around your content easier.
- Image (Inline & Pop-up). Say, your PDF only contains text and no pictures. Inline images are the solution you’ll want in order to add some static illustrations to your document. Choose the pop-up image option to add high-resolution copies of your images. Or put previews on the page and show the originals via pop-ups. Pretty useful for showcasing your product range and details in a catalog.
- Image gallery. This feature adds a clickable element to the page, opening an entire gallery of images in a pop-up. It's a nice way to add an extra dimension to your flipbook which makes it interesting to explore without cluttering the page.
- Animated GIF. GIFs are wonderful! They’re entertaining, engaging, informative, and so much more. Here are a few tips on how to use GIFs for any content.
- Forms & quizzes. You can add Google Forms, Microsoft Forms, and Typeform surveys to communicate with your readers directly. Forms will open in a pop-up or a new tab, depending on the security level you set.
#5 Share (or Embed) Your Flipbook
Once your flipbook is beautiful and interactive, it’s time to share it with your readers. To do that, you can open the Share window, and copy the link from there, post it on social media, or generate a QR code if you plan to market it offline.
For easy embedding, open the Embed window and copy the embed code.
By the way, you can choose the right preview mode, too, to weave your content into your website in the most fitting way. Here’s what your flipbook will look like:
That’s it! You’ve just created, customized, and shared your first flipbook. Take your time exploring all the great features FlippingBook Online has to offer and let us know if you have any questions. We’re always here to help!


